
Vendor Approval Process Using Microsoft Power Automate and SharePoint list – Part 2
Part 1 – Vendor Approval Process Using Microsoft Power Automate and SharePoint list
Now the last step of the flow is updating the SharePoint ‘Vendor List’ list for approval and reject process result.
Add a ‘condition’ step, add ‘Response’ using the dynamics box in the first condition box add condition ‘is equal to’ and in value condition part set ‘Approve’.
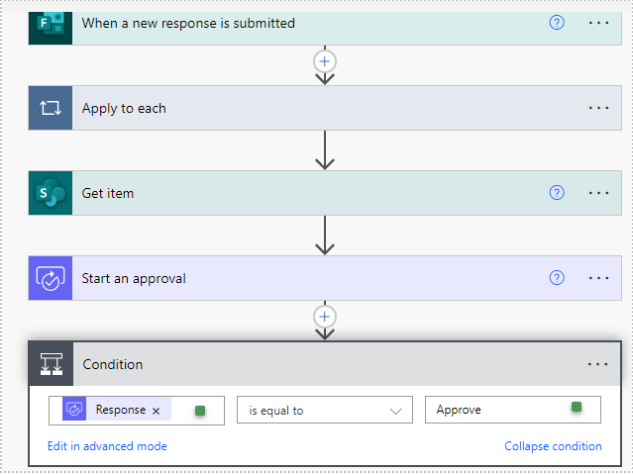
Now in ‘if Yes’ the true value case of condition box send email to vendor for approval confirmation using action step ‘Send an email
(V2)’ from Outlook connectors. and then update SharePoint Vendor List Item for ‘Approved’ status.
To – Title (In Vendor List we are using TItle as Email of Vendor)
Subject – Approval Request for vendor @{triggerBody()?[‘VendorName’]} is approved
Body – Your request for has been approved by @{body(‘Start_an_approval’)[‘responder’][‘displayName’]}. Comments (if any): @{body(‘Start_an_approval’)?[‘comments’]}
You can select dynamics value using ‘Dynamics Content’ Box.

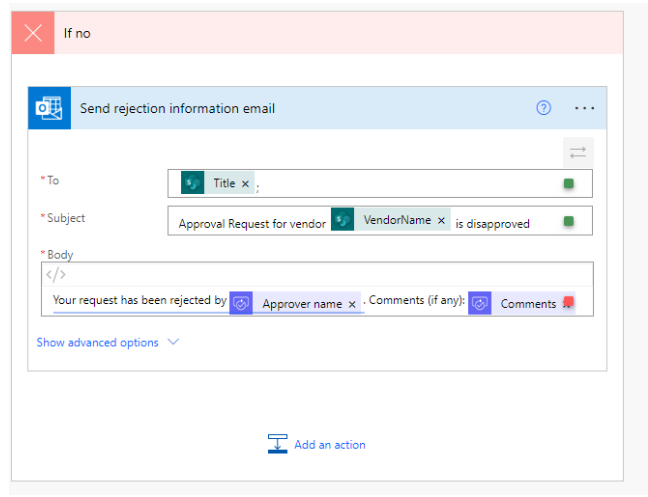
Now in the ‘If No’ part of the condition box also send an email to the vendor that your request is rejected using the same process. Add action step ‘Send an email (V2)’ from Outlook connectors. And step inputs like –
To – Title (In Vendor List we are using TItle as Email of Vendor)
Subject – Approval Request for vendor @{triggerBody()?[‘VendorName’]} is rejected
Body – Your request has been rejected by @{body(‘Start_an_approval’)[‘responder’][‘displayName’]}. Comments (if any): @{body(‘Start_an_approval’)?[‘comments’]}
You can select dynamics value using ‘Dynamics Content’ Box.
his is how you can set up an automated process for vendor approval.
Testing Steps-
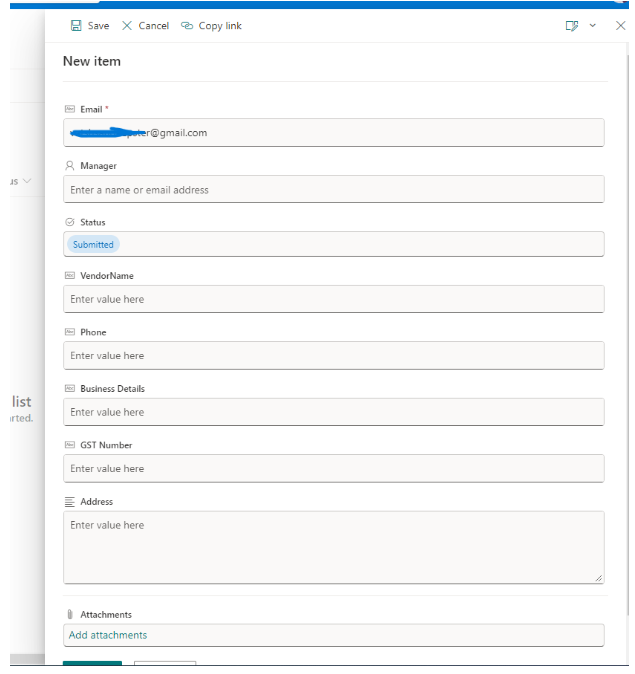
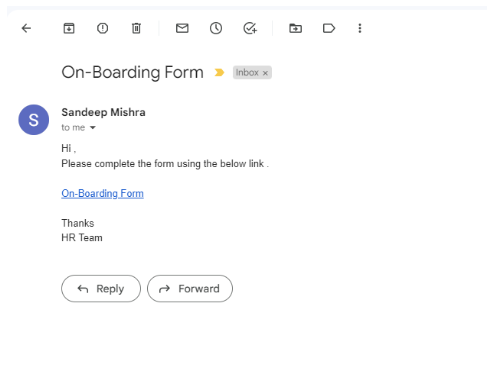
Step 1- Add a vendor in SharePoint ‘Vendor List’ just add an email address so one email will be sent to the vendor for submitting his details. Also add Manager who will approve vendor in Manager column.
And email will be sent vendor with Vendor form.
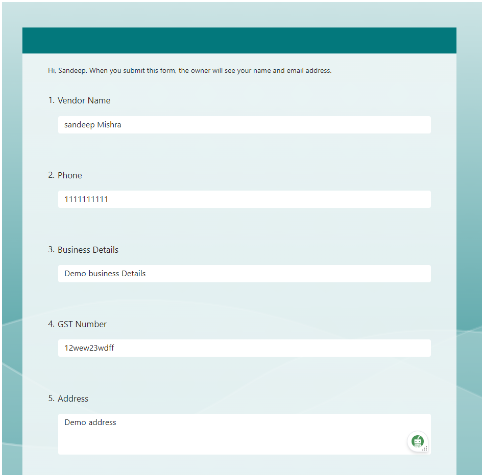
Step 2 – Vendor will fill the form using given link. Vendor will fill those columns –
Vendor Name, Phone, Business Details, GST Number, Address and submit form.
Record will be updated in vendor list using flow –

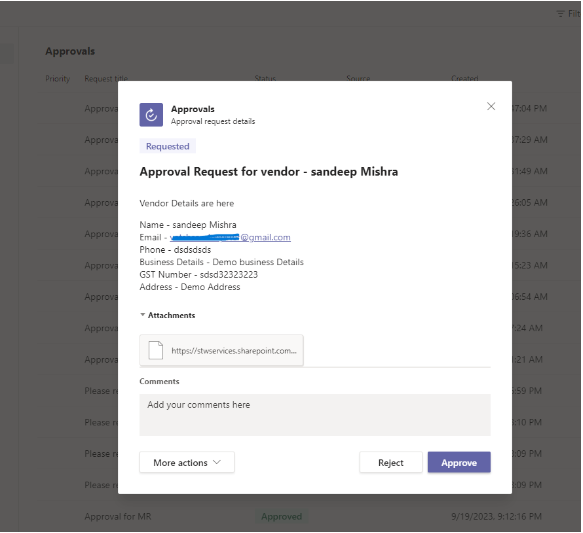
Step 3 – Approval will be summitted to person who added as manage in that list. In example I added my user so I got approval request in microsoft Teams with details –
Approval Request for vendor – sandeep Mishra
Vendor Details are here
Name – sandeep Mishra
Email – vatshsan*@gmail.com
Phone – Demo Business
Details – Demo business Details
GST Number – sdsd32323223
Address – Demo Address
Once the manager approves or disapproves, the vendor will get a notification by email.

Conclusion –
Developing a streamlined and efficient vendor approval process is crucial. It not only ensures that you work with the best vendors but also guarantees smooth operations in your supply chain or service delivery.
In this tutorial, we’ve seen how you can structure a comprehensive vendor approval process using Microsoft Power Automate and SharePoint list. We’ve broken down the process into the following steps:
Vendor Invitation
Registration Form Automation
Approval Automation
Building the Vendor List
We’ve explored each step-in detail, starting with creating a Vendor List in SharePoint, setting up an automated cloud flow using Microsoft Power Automate, and automating email communication with vendors. We’ve also demonstrated how the approval process works and how it integrates with Microsoft Teams for notifications.