Category: Web development

  • Document Scanning and Beyond: How is Artificial Intelligence Revolutionizing This Landscape?

    Document Scanning and Beyond: How is Artificial Intelligence Revolutionizing This Landscape?

    AI or Artificial Intelligence has taken the front seat in multiple domains and contributed immensely in leveraging productivity, accuracy, and outcome. The recent addition to the list is document scanning and management. The introduction of AI in document scanning has curbed tons of issues such as image blurring, missing out on certain information, and effective data handling.
    Needless to say, an e-signing facility that AI endowed businesses is a real game-changer as it took no time to make business-critical documents legally and professionally sound. If you haven’t explored the power of AI in document scanning and management then do it now while this blog guides you all through the journey.

    Document Scanning – A Necessity for Today’s Time

    Document scanning is the process of extracting paper-based information as it is in digital documents using digital scanners. The scanner is a machine functioning using OCR technology. OCR stands for Optical Character Recognition, which is useful in understanding recognizing the text, and converting it into digital data.
    Considering the huge data that today’s businesses have to deal with document scanning is the best bet to make while you seek reduced operational cost, enhanced productivity, and convalesced information access. Here are some of the reasons why businesses of all sorts and all industries must start scanning the documents.

    #Save huge operational cost

    When it comes to management and information retrieval, paper documents are a tough nut to crack. They are also highly demanding at the storage and consistency-maintenance front. They need huge space to be stored for future use. Cabinets, floor space, and a team of looking after them are the areas where one has to invest greatly in managing the paper documents.

    Once you scan the documents and turn them into digital form, all these hassles will be miles away. There is ample cloud storage offered at a very genuine price. You can covert the documents into multiple formats like images, presentations, and word files. They can be sorted and managed as per the categories and departments. All in all, scanned documents are easier to handle and manage.

    #Safety at its best

    Even if you manage to spend all the necessitated capital for managing paper-based documents, they are highly prone to get physically damaged and stealing. And if that happens, a business might lose assets worth a million.

    Scanned documents grant amazing mental peace at this front as well as digital documents can be password protected and access can be fully controlled.

    #Quick and easy information sharing

    Paper documents need to be couriered or posted to each at a different destination. This is a highly cost and time-consuming affair and the fear of misplacement of documents is always there. Scanned documents can be shared over a single click and will be received by the other party in the blink of an eye without compromising on security.

    #Environment friendly

    Lastly and more importantly, scanned documents don’t harm the environment.

    Document Scanning and AI – The ‘Made For Each Other’ Digital Duo

    Document scanning is already a game-changer, reaches the heights of perfection, and utilizes it while it combines with AI. While OCR technology reads the text on paper documents, AI interprets it intelligently.

    The information interpretation involves information prioritization, display of crucial data such as names mentioned in the document, dates, amounts, contact numbers, and emails, and sorting out information. AI is involved extensively in extracting data and sorting it as per the pre-defined criteria.

    The use of AI in document scanning has enabled multiple jobs such as:

    • Digitally signing the scanned PDFs or other documents using data-driven devices is possible.
    • Creating multiple formats of the same documents over a single click.
    • Automate the workflow from start to finish.
    • Doing all the post-scanning character recognition with zero human intervention.
    • Automatic data extraction and document clustering.
    • Reading the content, analyzing it, and sorting it accordingly.
    • Performing data analysis and predictive analysis is now a one-click job as scanned documents are compatible with data analysis software.

    Key Application of AI in Document Scanning

    An AI-empowered document scanning is going to do wonders at various fronts. Here are some of the most famed application areas of AI in document scanning jobs.

    Invoices and PFD Documents

    Enterprises and retail industries are benefitted extremely from AI and document scanning as they can manage a huge pile of invoices and documents over a single click. Manual work related to extracting information, sorting our customer information from invoices, and sorting the documents automatically is cut down significantly.

    #Bank Statements

    Banks are using AI in full swing as this technology allows them to scan the bank statements with utmost accuracy and share them with the customers over a single click. As these PDFs can be password protected, there is no question of compromised security. AI implementation allows banks to export the data/information to Excel or CSV files automatically.

    #HR forms and Payrolls

    AI-driven document scanning allows accurate information extraction for multiple HR forms and payroll purposes.

    #Sales & Purchase Order

    Extract information relevant for sales or purchase orders and export it directly to whichever system and device you want.

    #Price List

    The in-built AI and parser technology lets end-users extract product lists, tables, and other details from any paper-based document.

    Real-Time Examples of AI in Document Scanning

    Many tech giants such as Adobe and Google realized the power of AI and took no time to utilize it in document scanning. Here are some of the real-world examples of AI handling document scanning.

    Stack

    Stack comes from the trusted house of Google. Currently functional in US only, Slack is Google experimental Android app bringing AI and document scanning together. Using the app, end-users can scan documents and receipts as PDF and organize them automatically.

    The technology at work in this revolutionary app is Document AI. It combines AI and NLP for creating high-end and technology-infused models for documents. The technology has already helped process billions of pages for insurance, banking, loan, medical, lending, and other purposes.

    Adobe Scan

    We all are familiar with Adobe’s contribution in making human life effortless with its revolutionary technology and products. Adobe Scan is one more marvel created by this tech giant. It is an AI-empowered Text-recognition Software delivered with the Adobe Sensei suite.

    The tool uses AI to clean the target image before the scanning so that the final scan comes out as neat as possible. The use of AI in this sense makes text translation quick and accurate.

    The AI used is so powerful that if you’re scanning folded documents then it will try to keep the impact of the fold as much as possible and capture a precise scanned image.

    AI also integrates the PDFs with Adobe Document Cloud and simplifies the entire storage hassle. The scanned documents will be automatically uploaded on the cloud saving a huge deal of time and effort.

    Future of AI in Document Scanning

    Seeing the commendable difference AI is making in document scanning, it’s easier to conclude that its penetration will become only stronger with time.

    The future of AI in document scanning comes with endless possibilities out of which the key ones are scanners with face recognition, online chat support while scanning, AI scanning the dialogues, and a dedicated PA to read the scanned text. This is one of much forward-thinking technology that humans can utilize to strengthen the document management job. If you haven’t given it a try, try it today as it’s worth a try.
  • Which .NET platform suits your project best?

    Which .NET platform suits your project best?

    Understanding the difference between .NET Core, .NET Framework and Xamarin

    For quite some time now, coders have been flooded with various unique innovations, making it complicated for them to choose the right platforms for developing projects. Today, their focus is not only on developing IT solutions that achieve the pre-decided functionality, but also on ensuring that the solution doesn’t get outdated soon, is compatible on multiple platforms and is easy to build, with the necessary pre-built libraries and widgets making the work faster.

    Technologies like .NET Core, .NET Framework, and Xamarin have changed the face of application development and made it easier for developers to adapt to different screens like laptops, tablets and mobile phones. Even though all three of them might seem overlapping, each one is considerably different from the other.

    Prima facie, the main distinction between the three is simple. The .NET Framework is the traditionally used platform for building .NET applications on Windows. The .NET Core is a cross-platform which is used to develop consoles and web-apps that can run on any platform – Windows, Linux or Mac. Xamarin is an open-source Mono-based cross-platform used for building mobile apps that are compatible with iOS, Android and Windows phones.

    .NET Framework

    The .NET Framework proves to be highly beneficial in providing services such as memory management, type safety, networking, application deployment, security and data structures. It is recommended to use .NET Framework if the existing application already operates on it and you are looking to extend its functionality, or if you want access to third-party libraries.

    Applications of .NET Framework are written in C#, F# or Visual Basic and compiled to Common Intermediate Language (CIL). The main components of .NET Framework include Common Language Runtime (CLR) and .NET Framework Class Library. Since the CLR runs .NET applications on a given machine, it converts the CIL to machine code. Along with this, the .NET Framework Class Library provides language interoperability among supported languages.

    .NET Core

    .NET Core is a high-performing, open-source cross-platform for building websites, services and console apps on Windows, Linux and Mac. Its performance with regard to mapping is better as compared to .NET Framework, as well as it has the ability to self-host or host on Docker, IIS, Apache or Nginx and requires only a single NuGet package.

    .NET Core definitely has its own advantages. It can be used for server applications when:

    • You are targeting microservices.
    • You are using Docker containers.
    • You need scalable systems.
    • You want to use several versions of .NET in the same project.

    .NET Core has been designed to cater to a modular approach and it is fast and lightweight.

    Xamarin

    Xamarin is a .NET implementation for running applications on all the major mobile operating systems, including iOS and Android. It uses Mono as the .NET implementation for running the apps, and projects can be created from Visual Studio or Visual Studio for Mac. In the age where apps run on iOS and Android, Xamarin promises to create the best User Interface. In fact, Microsoft claims that Xamarin is the finest way to optimize performance in apps on multiple platforms. It is the best choice for developing native mobile apps with the best UI performance.

    Xamarin brings some exciting features to the .NET ecosystem such as base framework for accessing native features, platform-specific libraries, and Extensible Markup Language (known as XAML) for building dynamic mobile apps using C#. In order to build any mobile app using C#, Xamarin is the only available choice for developers.

    All the three platforms provide unique options for building various desktop, mobile, cloud, gaming and IoT applications within the .NET Ecosystem, as they share many underlying technologies. Moving ahead, Microsoft is heavily investing in .NET Forward to open up more avenues for developers on these platforms. Each of these software-building technologies has varying characteristics and implementations which gives each their distinct characteristics. But it becomes necessary for developers to compare them and gain sufficient knowledge about them, so that they can choose what’s best according to their requirements.

    If you are looking to develop an idea and want to explore your options, connect with us at support@stw-services.com and we can help you choose the best platform to build optimized solutions.

  • STW Services LLP Recognizes Our Employees’ Dedicated Efforts

    Recognizes Our Employees’ Dedicated Efforts:-

    Small businesses benefit their local communities in many ways. They promote and cultivate innovation as well as instill unique identity by adding diverse characteristics. 

    Another big way that small businesses help their local markets is by encouraging healthy competition that invigorates the economy. Not to mention, small businesses also provide and create jobs for their local communities.

    Small businesses do this and so much more! It’s clear that they make a big impact and help in many ways that often go unseen. That’s why at this time now more than ever, it’s vital that economic players of all sizes support and encourage small businesses.

    And that’s why our leadership team here at STW Services LLP would like to take this special opportunity to highlight our continuous appreciation for our team members! We value all of their hard work and the devotion they have toward helping us achieve our goals.

    Since 2011, we’ve provided services ranging from website development, to SEO, to marketing to HR. We’re truly the one-stop-shop for all your IT needs. It’s our mission to help you connect with the right technology for your business.

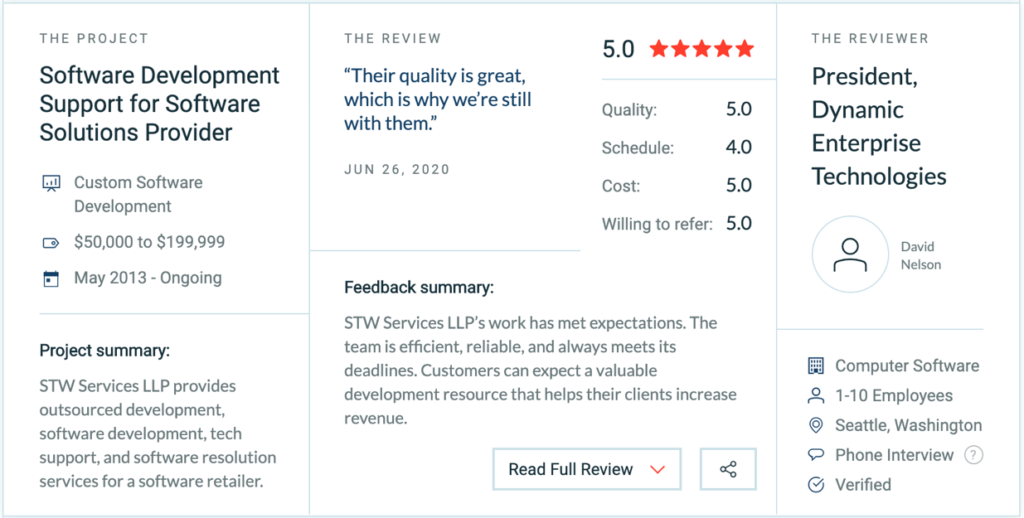
    Our wonderful employees are grounded in our core values of quality, punctuality, and adaptability. We’ve completed over 1,000 projects in over 35 countries. In an ongoing project, we’re providing software development support for a software solutions provider.

    In this engagement, our team handles work in web development, software development, technical support, and software issue resolution. David Nelson, the president of the company kindly took the time to leave us a review.

    He said, “They hit deadlines well and it’s nice that they provide a wide array of skills to help our customers.” He continued, “They’re reliable and there when I need help.” We’re extremely grateful to David and to all of our clients who have left reviews.

    Reviews and our presence on The Manifest, a platform that helps companies stand out, helps us recognize our employees’ hard work and contributions. We’re always thrilled to celebrate the success and victories of our team members.

    Please join us in giving our small but mighty team of rockstars a big thank you!

    If you’d like to discuss your next project with us, feel free to contact us today!

  • The Latest Addition to the Laravel Eco-system

    The Latest Addition to the Laravel Eco-system

    If you’ve been a user of Laravel, you must’ve surely heard about their latest offering. Nova is an administration panel for Laravel. This sleek and beautifully designed single-page application, built on the Vue.js platform and Tailwind, is highly customizable in a true Laravel fashion.

    Nova is a composer package, which can be installed in an existing Laravel package. It does not interfere with an existing application in any way. In fact, you can install Nova in the existing Laravel applications which you have already built, without hampering the application, as well as removing the need of starting all over again, if you want to integrate resource management in your application. On the front-end, Nova is powered by Vue.js, Vue components and Tailwind.css. This makes for a powerful and flexible combination, especially with regards to customization – it is easier than ever to build custom cards, tools and fields.

    With Nova, you can forget the clumsy, unmanageable administration panels. You can configure the whole dashboard with a simple PHP class. None of your configuration is stored in the database. It is a piece of cake to add an administration panel to the existing Laravel applications without interfering with the eloquent and potent models.

    Before you begin, here is a list of requirements which you need to preload before installing Laravel Nova:

    1. Composer
    2. Laravel Framework 5.8+
    3. Laravel Mix
    4. Node.js and NPM

     Nova supports all the new versions of Google Chrome, Apple Safari and Microsoft Edge web browsers.

    Features of Nova Laravel:

    The primary feature of Nova is to be able to create, read, update and delete resources from the database. The versatility of the app helps to create an easy to use and simplistic platform to get it done.

    • Resource Management
    • Search Integration
    • Filters
    • Lens
    • Actions
    • Metrics
    • Customization

    If you’ve been a user of Laravel, you must’ve surely heard about their latest offering. Nova is an administration panel for Laravel. This sleek and beautifully designed single-page application, built on the Vue.js platform and Tailwind, is highly customizable in a true Laravel fashion.

    Nova is a composer package, which can be installed in an existing Laravel package. It does not interfere with an existing application in any way. In fact, you can install Nova in the existing Laravel applications which you have already built, without hampering the application, as well as removing the need of starting all over again, if you want to integrate resource management in your application. On the front-end, Nova is powered by Vue.js, Vue components and Tailwind.css. This makes for a powerful and flexible combination, especially with regards to customization – it is easier than ever to build custom cards, tools and fields.

    With Nova, you can forget the clumsy, unmanageable administration panels. You can configure the whole dashboard with a simple PHP class. None of your configuration is stored in the database. It is a piece of cake to add an administration panel to the existing Laravel applications without interfering with the eloquent and potent models.

    Before you begin, here is a list of requirements which you need to preload before installing Laravel Nova:

    1. Composer
    2. Laravel Framework 5.8+
    3. Laravel Mix
    4. Node.js and NPM

     Nova supports all the new versions of Google Chrome, Apple Safari and Microsoft Edge web browsers.

    Features of Nova Laravel:

    The primary feature of Nova is to be able to create, read, update and delete resources from the database. The versatility of the app helps to create an easy to use and simplistic platform to get it done.

    • Resource Management
    • Search Integration
    • Filters
    • Lens
    • Actions
    • Metrics
    • Customization
  • Adding Content Templates to Editor in Kentico 9

    Adding Content Templates to Editor in Kentico 9 – It’s handy to adding site typography as content templates in Kentico CKeditor. Follow steps given below to add and customize CKeditor toolbar and include new content templates.

    Important : Must check Kentico CKeditor version to download content templates from given link http://ckeditor.com/addon/templates.

    Step1: Download sample content template from http://ckeditor.com/addon/templates. Extract downloaded zip folder and copy template folder in \CMS\CMSAdminControls\CKeditor\plugins. It should look like example image.

    Content Template Plugin

    Step 2: Adding config properties  – Open config.js file under CKeditor folder and add these lines on top of file along with other properties-

    config.extraPlugins = ‘templates’;

    /* CMS */

    config.plugins += ‘,showborders’;

    /* Templates */

    config.plugins += ‘,templates’;

    It should be like image example.

    Kentico Template

    Step3: Customize toolbar : Add template after source in toolbar_FULL

    config.toolbar_Full = [

    [sourceName, ‘-‘, ‘Templates’],

    [‘Cut’, ‘Copy’, ‘Paste’, ‘PasteText’, ‘PasteFromWord’, ‘Scayt’, ‘-‘],

    [‘Undo’, ‘Redo’, ‘Find’, ‘Replace’, ‘RemoveFormat’, ‘-‘],

    [‘Bold’, ‘Italic’, ‘Underline’, ‘Strike’, ‘Subscript’, ‘Superscript’, ‘-‘],

    [‘NumberedList’, ‘BulletedList’, ‘Outdent’, ‘Indent’, ‘Blockquote’, ‘CreateDiv’, ‘-‘],

    [‘JustifyLeft’, ‘JustifyCenter’, ‘JustifyRight’, ‘JustifyBlock’, ‘-‘],

    ‘/’,

    [‘InsertLink’, ‘Unlink’, ‘Anchor’, ‘-‘],

    [‘InsertImageOrMedia’, ‘QuicklyInsertImage’, ‘Table’, ‘HorizontalRule’, ‘SpecialChar’, ‘-‘],

    [‘InsertForms’, ‘InsertPolls’, ‘InsertRating’, ‘InsertYouTubeVideo’, ‘InsertWidget’, ‘-‘],

    [‘Styles’, ‘Format’, ‘Font’, ‘FontSize’],

    [‘TextColor’, ‘BGColor’, ‘-‘],

    [‘InsertMacro’, ‘-‘],

    [‘Maximize’, ‘ShowBlocks’]

    ];

    It should be like:

    Kentico

    Step4: Setup toolbar_Full, At bottom of config file change value –

    config.toolbar = config.toolbar_Full;

    Now ckeditor is ready to use templates and can do testing after login in CMSDesk. Open editable page. Ckeditor should show template icon along with source.

    Kentico Template

    After clicking in template icon, it will show all available content templates.  You can select any of these templates and insert in editable part and modify accordingly. You don’t need to be worried about styling content text. It helps non technical person to make pages and style it easily.

    capture5

    Next part is,  how to add new templates in editor. Open default.js file under CKeditor/plugins/templates/templates/default.js

    capture6

    Default.js already has some inbuilt templates, you can add more templates using same structure. Using example I added youtube responsive video template at bottom of default.js file.

    {

    title: ‘Responsive YouTube Video (with controls)’,

    //image: ‘template1.gif’,

    description: ‘Responsive YouTube Video (with controls)’,

    html: ‘<div class=”youtube-container”><div class=”youtube-player” data-controls=”1″ data-id=”h6w0uEgMXuQ”><div class=”play-button”> </div></div>’ +

    ‘\r\n</div><div style=”color:red;”>You must view source, edit the data-id and replace value with YouTube video id (then delete this line)</div>\r\n’

    }

    capture7
  • Connection from PHP to Microsoft Dynamics CRM

    Connection from PHP to Microsoft Dynamics CRMThis time we will learn how to connect Microsoft dynamics CRM using PHP code. Microsoft dynamics CRM soap service can be a way to make calls from PHP source code. A valid soap header is required to execute soap request. Let’s see how to create a valid header using PHP code:

    To get valid soap request, first need to create token1, token2, and keyIdentifer which can be created using online user name and password.

    Soap enavlop for getting token1, token2, ekyidentifer:

    $xml = “<s:Envelope xmlns:s=\”http://www.w3.org/2003/05/soap-envelope\” xmlns:a=\”http://www.w3.org/2005/08/addressing\” xmlns:u=\”http://docs.oasis-open.org/wss/2004/01/oasis-200401-wss-wssecurity-utility-1.0.xsd\”>”;

    $xml .= “<s:Header>”;

    $xml .= “<a:Action s:mustUnderstand=\”1\”>http://schemas.xmlsoap.org/ws/2005/02/trust/RST/Issue</a:Action>”;

    $xml .= “<a:MessageID>urn:uuid:” . $this->newGUID () . “</a:MessageID>”;

    $xml .= “<a:ReplyTo>”;

    $xml .= “<a:Address>http://www.w3.org/2005/08/addressing/anonymous</a:Address>”;

    $xml .= “</a:ReplyTo>”;

    $xml .= “<a:To s:mustUnderstand=\”1\”>https://login.microsoftonline.com/RST2.srf</a:To>”;

    $xml .= “<o:Security s:mustUnderstand=\”1\” xmlns:o=\”http://docs.oasis-open.org/wss/2004/01/oasis-200401-wss-wssecurity-secext-1.0.xsd\”>”;

    $xml .= “<u:Timestamp u:Id=\”_0\”>”;

    $xml .= “<u:Created>” . gmdate ( ‘Y-m-d\TH:i:s.u\Z’, $now ) . “</u:Created>”;

    $xml .= “<u:Expires>” . gmdate ( ‘Y-m-d\TH:i:s.u\Z’, strtotime ( ‘+60 minute’, $now ) ) . “</u:Expires>”;

    $xml .= “</u:Timestamp>”;

    $xml .= “<o:UsernameToken u:Id=\”uuid-” . $this->newGUID () . “-1\”>”;

    $xml .= “<o:Username>” . $username . “</o:Username>”;

    $xml .= “<o:Password>” . $password . “</o:Password>”;

    $xml .= “</o:UsernameToken>”;

    $xml .= “</o:Security>”;

    $xml .= “</s:Header>”;

    $xml .= “<s:Body>”;

    $xml .= “<trust:RequestSecurityToken xmlns:trust=\”http://schemas.xmlsoap.org/ws/2005/02/trust\”>”;

    $xml .= “<wsp:AppliesTo xmlns:wsp=\”http://schemas.xmlsoap.org/ws/2004/09/policy\”>”;

    $xml .= “<a:EndpointReference>”;

    $xml .= “<a:Address>urn:” . $urnAddress . “</a:Address>”;

    $xml .= “</a:EndpointReference>”;

    $xml .= “</wsp:AppliesTo>”;

    $xml .= “<trust:RequestType>http://schemas.xmlsoap.org/ws/2005/02/trust/Issue</trust:RequestType>”;

    $xml .= “</trust:RequestSecurityToken>”;

    $xml .= “</s:Body>”;

    $xml .= “</s:Envelope>”;

    In response, you will get element “CipherValue” which has both tokens which you can fetch from response. See sample code:

    $response = curl_exec ( $ch );

    curl_close ( $ch );

    $responsedom = new DomDocument ();

    $responsedom->loadXML ( $response );

    $cipherValues = $responsedom->getElementsbyTagName ( “CipherValue” );

    $token1 = $cipherValues->item ( 0 )->textContent;

    $token2 = $cipherValues->item ( 1 )->textContent;

    Next is to get KeyIdentifier value which you can get using “KeyIdentifier” element name from response.

    $keyIdentiferValues = $responsedom->getElementsbyTagName ( “KeyIdentifier” );

    Now need to get online header using token1, token2 and KeyIdentifier. Below you can see example of header xml for Soap request:

    $xml = “<s:Header>”;

    $xml .= “<a:Action s:mustUnderstand=\”1\”>http://schemas.microsoft.com/xrm/2011/Contracts/Services/IOrganizationService/Execute</a:Action>”;

    $xml .= “<Security xmlns=\”http://docs.oasis-open.org/wss/2004/01/oasis-200401-wss-wssecurity-secext-1.0.xsd\”>”;

    $xml .= “<EncryptedData Id=\”Assertion0\” Type=\”http://www.w3.org/2001/04/xmlenc#Element\” xmlns=\”http://www.w3.org/2001/04/xmlenc#\”>”;

    $xml .= “<EncryptionMethod Algorithm=\”http://www.w3.org/2001/04/xmlenc#tripledes-cbc\”/>”;

    $xml .= “<ds:KeyInfo xmlns:ds=\”http://www.w3.org/2000/09/xmldsig#\”>”;

    $xml .= “<EncryptedKey>”;

    $xml .= “<EncryptionMethod Algorithm=\”http://www.w3.org/2001/04/xmlenc#rsa-oaep-mgf1p\”/>”;

    $xml .= “<ds:KeyInfo Id=\”keyinfo\”>”;

    $xml .= “<wsse:SecurityTokenReference xmlns:wsse=\”http://docs.oasis-open.org/wss/2004/01/oasis-200401-wss-wssecurity-secext-1.0.xsd\”>”;

    $xml .= “<wsse:KeyIdentifier EncodingType=\”http://docs.oasis-open.org/wss/2004/01/oasis-200401-wss-soap-message-security-1.0#Base64Binary\” ValueType=\”http://docs.oasis-open.org/wss/2004/01/oasis-200401-wss-x509-token-profile-1.0#X509SubjectKeyIdentifier\”>” . $keyIdentifer . “</wsse:KeyIdentifier>”;

    $xml .= “</wsse:SecurityTokenReference>”;

    $xml .= “</ds:KeyInfo>”;

    $xml .= “<CipherData>”;

    $xml .= “<CipherValue>” . $token1 . “</CipherValue>”;

    $xml .= “</CipherData>”;

    $xml .= “</EncryptedKey>”;

    $xml .= “</ds:KeyInfo>”;

    $xml .= “<CipherData>”;

    $xml .= “<CipherValue>” . $token2 . “</CipherValue>”;

    $xml .= “</CipherData>”;

    $xml .= “</EncryptedData>”;

    $xml .= “</Security>”;

    $xml .= “<a:MessageID>urn:uuid:” . $this->newGUID () . “</a:MessageID>”;

    $xml .= “<a:ReplyTo>”;

    $xml .= “<a:Address>http://www.w3.org/2005/08/addressing/anonymous</a:Address>”;

    $xml .= “</a:ReplyTo>”;

    $xml .= “<a:To s:mustUnderstand=\”1\”>” . $url . “XRMServices/2011/Organization.svc</a:To>”;

    $xml .= “</s:Header>”;

    CRM URN Address based on the Online region of customer. You can use this function to get correct URN:

    function GetUrnOnline($url) {

    if (strpos ( strtoupper ( $url ), “CRM2.DYNAMICS.COM” )) {

    return “crmsam:dynamics.com”;

    }

    if (strpos ( strtoupper ( $url ), “CRM4.DYNAMICS.COM” )) {

    return “crmemea:dynamics.com”;

    }

    if (strpos ( strtoupper ( $url ), “CRM5.DYNAMICS.COM” )) {

    return “crmapac:dynamics.com”;

    }

    if (strpos ( strtoupper ( $url ), “CRM6.DYNAMICS.COM” )) {

    return “crmoce:dynamics.com”;

    }

    if (strpos ( strtoupper ( $url ), “CRM7.DYNAMICS.COM” )) {

    return “crmjpn:dynamics.com”;

    }

    if (strpos ( strtoupper ( $url ), “CRM9.DYNAMICS.COM” )) {

    return “crmgcc:dynamics.com”;

    }

    return “crmna:dynamics.com”;

    }

    Using header you can connect Dynamics CRM from PHP code. See example code lines to get list data from PHP code:

    / Get Dynamics CRM Online Header

    $url = “https://org.crm.dynamics.com/”;

    $username = “user@dynamics.net”;

    $password = “password”;

    $dynamicsCrmHeader = new DynamicsCrmHeader ();

    $authHeader = $dynamicsCrmHeader->GetHeaderOnline ( $username, $password, $url );

    // Get Dynamics CRM Online Header

    Soap request for getting list:

    $xml .= “<s:Envelope xmlns:s=\”http://www.w3.org/2003/05/soap-envelope\” xmlns:a=\”http://www.w3.org/2005/08/addressing\”>”;

    $xml .= $authHeader->Header;

    $xml =”<s:Body>”;

    $xml .=”<Execute xmlns=\”http://schemas.microsoft.com/xrm/2011/Contracts/Services\” xmlns:i=\”http://www.w3.org/2001/XMLSchema-instance\”>”;

    $xml .=”<request i:type=\”a:RetrieveMultipleRequest\” xmlns:a=\”http://schemas.microsoft.com/xrm/2011/Contracts\”>”;

    $xml .=”<a:Parameters xmlns:b=\”http://schemas.datacontract.org/2004/07/System.Collections.Generic\”>”;

    $xml .=”<a:KeyValuePairOfstringanyType>”;

    $xml .=”<b:key>Query</b:key>”;

    $xml .=”<b:value i:type=\”a:QueryExpression\”>”;

    $xml .=”<a:ColumnSet>”;

    $xml .=”<a:AllColumns>true</a:AllColumns>”;

    $xml .=”<a:Columns xmlns:c=\”http://schemas.microsoft.com/2003/10/Serialization/Arrays\”>”;

    $xml .=”</a:Columns>”;

    $xml .=”</a:ColumnSet>”;

    $xml .= “<a:Criteria>”;

    $xml .= “<a:Conditions />”;

    $xml .= “<a:FilterOperator>And</a:FilterOperator>”;

    $xml .= “<a:Filters />”;

    $xml .= “</a:Criteria>”;

    $xml .=”<a:Distinct>false</a:Distinct>”;

    $xml .=”<a:EntityName>list</a:EntityName>”;

    $xml .=”<a:LinkEntities />”;

    $xml .=”<a:Orders />”;

    $xml .=”<a:PageInfo>”;

    $xml .=”<a:Count>0</a:Count>”;

    $xml .=”<a:PageNumber>0</a:PageNumber>”;

    $xml .=”<a:PagingCookie i:nil=\”true\” />”;

    $xml .=”<a:ReturnTotalRecordCount>false</a:ReturnTotalRecordCount>”;

    $xml .=”</a:PageInfo>”;

    $xml .=”<a:NoLock>false</a:NoLock>”;

    $xml .=”</b:value>”;

    $xml .=”</a:KeyValuePairOfstringanyType>”;

    $xml .=”</a:Parameters>”;

    $xml .=”<a:RequestId i:nil=\”true\” />”;

    $xml .=”<a:RequestName>RetrieveMultiple</a:RequestName>”;

    $xml .=”</request>”;

    $xml .=”</Execute>”;

    $xml .=”</s:Body>”;

    $xml .= “</s:Envelope>”;

    You need to make soap call and convert response as  DomDocument.

    $client = new DynamicsCrmSoapClient ();

    $response = $client->ExecuteSOAPRequest ($xml, $url );

    //echo $response;

    $responsedom = new DomDocument ();

    $responsedom->loadXML ( $response );
    Please find code sample here: https://github.com/stw-services/Dynamics-CRM/tree/master/PHP-MSCRM

    🙂

    Thanks for reading 

  • How to create theme in Magento 2

    How to create theme in Magento 2

    How to create theme in Magento 2-

    1. Install magento 2.
    2. Go to admin panel and login.
    3. Now you may see this window ( links not working )

    4. To solve the issue, open your xampp shell

    5. Specify your path

    6.  Run following command from Magento root:
    php bin/magento setup:static-content:deploy

    7. Go to admin panel and check if the issue has fixed. You can see the admin panel like this.

    8. Now you can start with creating your custom theme.
    9. At first, create your folder in C:\xampp\htdocs\Magento2_new\app\design\frontend\ and create your folder within

    10. Add or copy from an existing theme.xml to your theme directory app/design/frontend/

    11.  Add a composer.json file to the theme directory and register the package on a packaging server.

    12. To register your theme in the system, in your theme directory add a registration.php file with the following content:

    13. Copy a media folder from an existing theme to your theme directory.
    14. Create directories for static files. Your theme will likely contain several types of static files: styles, fonts, JavaScript and images. Each type should be stored in a separate sub-directory of web in your theme folder:

    15. At this point your theme file structure looks as follows:

    16. Your theme is created now. Login to admin panel and go to Stores -> Configuration -> Design, you can see your theme. Select your theme and save it.

    17. Run the following commands for static content deployment and database update from your root directory
    php bin/magento setup:static-content:deploy
    php bin/magento setup:upgrade
    18. You can customize your site now, using your own theme.

  • How to install Magento 2 – beginner’s guide (Windows)

    How to install Magento 2 – beginner’s guide (Windows)

    Install Magento 2 – beginner’s guide – Before continuing, make sure you have all the prerequisites, required for running Magento 2, below are system requirements

    System requirements:
    1. Apache Version: 2.2 or 2.4
    2. PHP version: 5.5.x, where x is 22 or greater
    3. MySQL Version : 5.6.x and upper


    Installation
    1. First and easiest way is to download the Magento installation package from official Magento site https://www.magentocommerce.com/download (Install from archive file – In this installation Magento core code is stored under /vendor directory and updating is possible through Magento admin.)

    See below screenshot

    2. Create one folder and Unzip in and put it under C:\xampp\htdocs\FOLDER_NAME
    3. Create a MySQL Database for Magento2 form phpmyadmin.
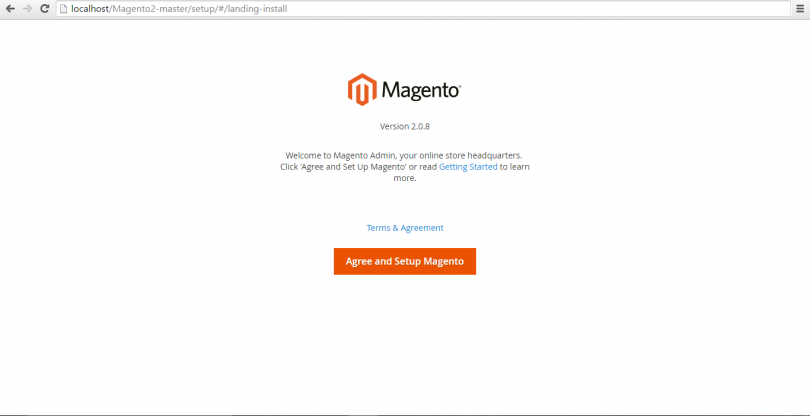
    4. Go through the Magento installation process, below is the first screen

    Click on button Agree and Setup Magento

    Click to start Readiness Check button to move forword

    If all the requirements are ok then it’ll show tick mark for that, click on Next button

    Here add all the fields properly as mentioned, host, Database Username and password, database name, Table prefix, etc

    and continue with the next button.

    In this step it’ll ask for your store’s admin url.


    5. After successful installation you will get this page
    6. Your frontend will look like this

    7. Your backend will look like this

  • Installation of Magento 2 on Ubuntu 16.04 LTS

    Installation of Magento 2 on Ubuntu 16.04 LTS

    Installation of Magento 2 on Ubuntu 16.04 LTS – I am writing this article for absolute beginner with deeper explanation of all steps which are required to install and configure Magento 2.0 on Ubuntu OS.
    Let’s start:
    a) Install Apache2, PHP, MySQL Server, composer and required packages for Magento 2.0.       Using command:

    1. $ sudo apt-get install apache2 php libapache2-mod-php mysql-server php-mysql php- dom php-simplexml php-curl php-intl php-xsl php-mbstring php-zip php-xml composer
    1. $ sudo a2enmod rewrite

    b) After successfully installation of these packages, make changes in the apache2.conf file     and AllowOverride all for Directory permission.

    1. $ cd /etc/apache
    2. $ Sudo nano apache2.conf

    Changes from

    Options Indexes FollowSymLinks
    AllowOverride none
    Require all granted

    To

    Options Indexes FollowSymLinks
    AllowOverride all
    Require all granted

    c) Use ^x (Ctrl + X) to exit from edit file screen. After making change in Config file, you need     to restart Apache. Use this command:

    1. $ sudo systemctl restart apache2.service

    d) Next step to install Magento 2 in var/www/html document using these commands:

    1. cd /var/ww/html/
    2. git clone https://github.com/magento/magento2.git
    3. cd magento2
    4. composer install

    e) You might face problem while installing Composer in Magneto 2 directory, like some of          PHP extensions are missing. Don’t be panic in this case and install missing extensions.

    Using commands like-

    1. $ Sudo apt-get install php-exnteionname (like php-gd)

    After installing all missing PHP extensions, change current directory to Magento 2 and            install composer:

    1. $ cd /var/www/html/magento2
    2. $ composer install

    f) Following messages come on screen:
    Loading composer repositories with package information
    Installing dependencies (including require-dev) from lock file

    – Installing magento/magento-composer-installer (0.1.6)
    Downloading: 100%

    – Installing braintree/braintree_php (2.39.0)
    Downloading: 100%

    – Installing justinrainbow/json-schema (1.6.1)
    Downloading: 100%

    – Installing symfony/console (v2.6.13)
    Downloading: 100%

    – Installing symfony/process (v2.8.4)
    Downloading: 100%

    ………………………………………………………………………………………….
    ………………………………………………………………………………………….

    – Installing composer/composer (1.0.0-alpha10)
    Downloading: 100%

    – Installing magento/composer (1.0.2)
    Authentication required (repo.magento.com):

    Username:
    Password:

      If composer prompts for authentication.

      Login to Login here https://www.magentocommerce.com/ and use public key as    Username and private key as Password.

    Installation of Magento 2 on Ubuntu 16.04 LTS

    g) Next step is to change directories permission to

    1. $ sudo chmod -R 777 /var/www/html/magento2/
    2. $ sudo chmod -R 777 /var/www/html/magento2/var/
    3. $ sudo chmod -R 777 /var/www/html/magento2/pub/

    Now we move to Mysql. To create Mysql database for magento 2 installation.

    Use Following command:
    $ sudo mysql –u root -p
    Enter Sudo password and now you are ready to execute Sql queries using mysql prompt.      Enter the following commands in the order to create a database instance named     magento2 with user name magento2
    h) Create database magento2;
    GRANT ALL ON magento.* TO magento2@localhost IDENTIFIED BY ‘magento2’;
    Database magento2 is created and all permissions are granted to magent2@localhost         user with password magento2.
    To check you can use:

    1. $ sudo mysql –u magento2 -p

    Enter password magento2 and use sql query:

    1. Mysql > show database;

    Use exit to come out from mysql prompt.

    Now you are ready for final step to install magento2.

        Open http://localhost/magento2/setup/

    Magento Installation

    If you face any permission issue, grant permission to Magento 2 root directory-

    1. $ sudo chmod -R 777 /var/www/html/magento2/

    When you get green check for file permission check, click next till installation finish.
    You can browse magento 2 using
         http://localhost/magento2/
         or
         http://{ipaddress}/magento2/

    At this stage, we are completed with Magento 2 installation on Ubuntu 16.04 LTS. Hope it       helps you!