
Vendor Approval Process Using Microsoft Power Automate and SharePoint list – Part 1
In today’s business landscape, developing a streamlined and efficient vendor approval process is crucial. It not only ensures that you work with the best vendors but also guarantees smooth operations in your supply chain or service delivery. Here’s a step-by-step guide on how you can structure a comprehensive vendor approval process. We will learn these things –
- Vendor invitation
- Registration Form automation
- Approval Automation
Building the Vendor List
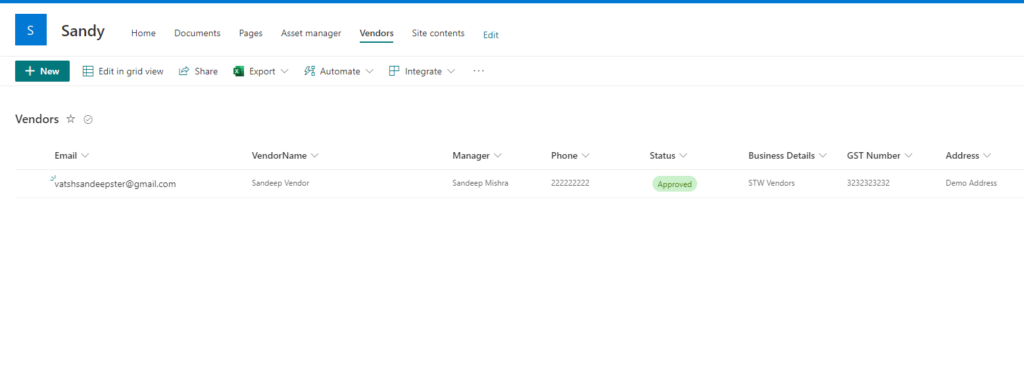
The very first step is to create a Vendor List in SharePoint. Create a list including columns like –
Email – (Renamed List title columns, don’t be confused if I am using title in flow)
Vendor Name – Type: String,
Manager – Type: Person,
Phone – Type: String,
Status – Type: Choies,
Business Details – Type: String,
GST Number – Type: String,
Address – Type: String.
Where manager column will include approver manage as person in SharePoint. You can refer to this image.
Our focus is to provide a real-time response to vendor registration, ensuring no delay in our collaboration processes. With the robust capabilities of Microsoft Power Automate, we’re implementing an automated cloud flow designed for precision and speed.
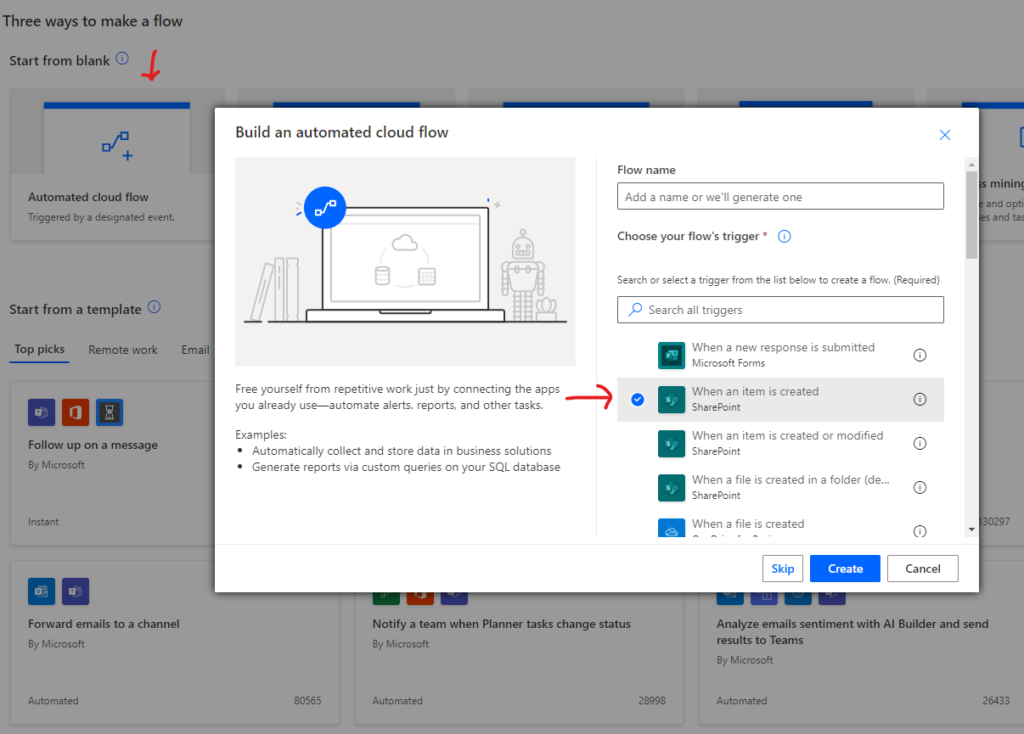
The magic begins the moment a potential vendor enters our ecosystem. Our selected trigger, ‘When an item is created‘, ensures that as soon as a vendor registers or submits their details, our automated process springs into action. This instantaneous response not only reduces manual intervention but also exemplifies our commitment to efficient and timely processes.
Let start our flow for vendor approval. Create Automated Cloud flow using Microsoft power automate flow. And select trigger ‘When an item is created’.
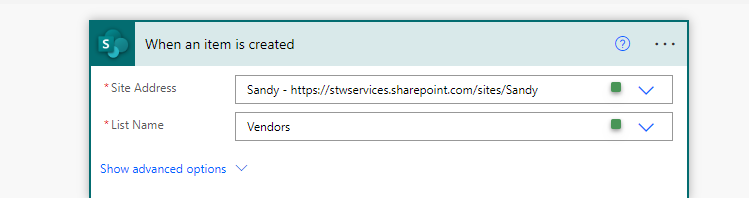
Select SharePoint Site and targeted list for this process. In our case I used my demo site ‘Sandy’ and List name – ‘Vendors’. Throughout this demo, I will use the same list and site. You can refer to yours accordingly.
Step Name – ‘When Item is created’
Inputs –
Site Address – Sandy
List Name – Vendors.
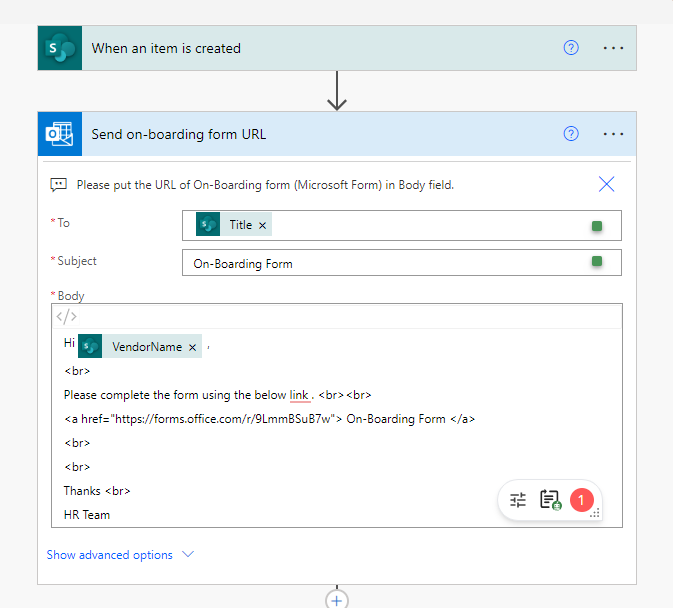
The subsequent action is to write an email to the vendor and attach the registration form in order to obtain the necessary information. The manager will provide their approval based on such information. For the same – Add send an email (V2) from the outlook connector.
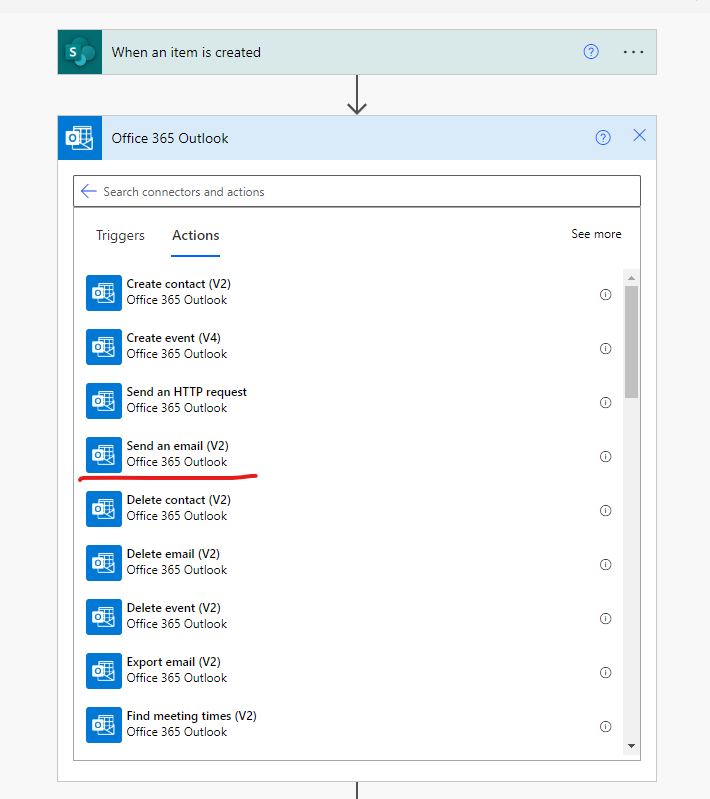
And add email content which we need to send to vendor like given image.
We are using Title here for storing emails. So we mapped columsn like –
To – Email (Topic)
Subject – ‘On-Boarding Form’
Body –
Hi @{triggerBody()?[‘VendorName’]} ,
Please complete the form using the below link .
yourformurlhere
Thanks
HR Team
Create a vendor registration form using Microsoft forms and name is “Vendor Form”
Add inputs –
Vendor Name – String
Phone – String
Business Details – String
GST Number – String
Address – String
Add new step to received response from Vendor form
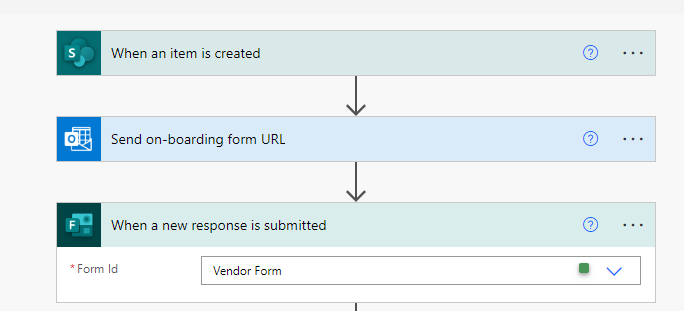
Add a new step apply to each to get response from ‘Vendor Form’ add new step ‘Get response details’
Form Id: ‘Vendor Form’
Response Id: Id (using dynamics content when item is created)
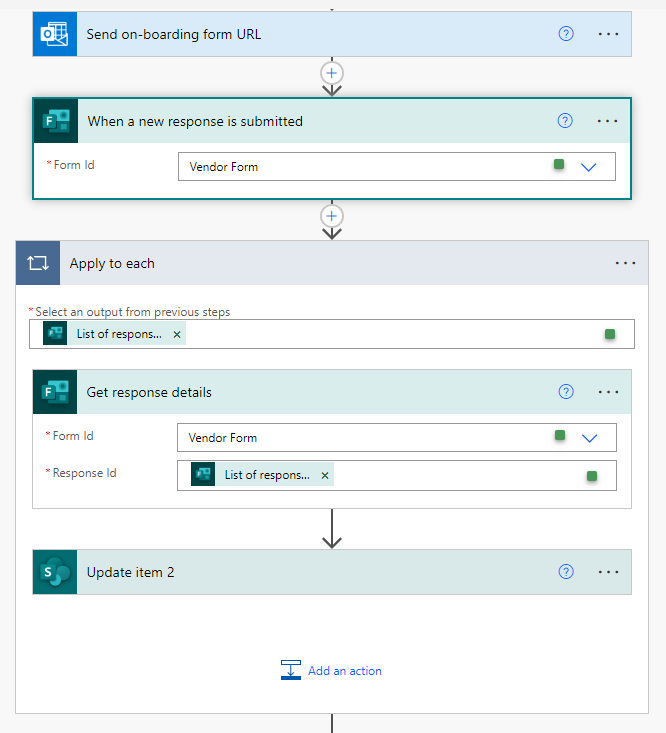
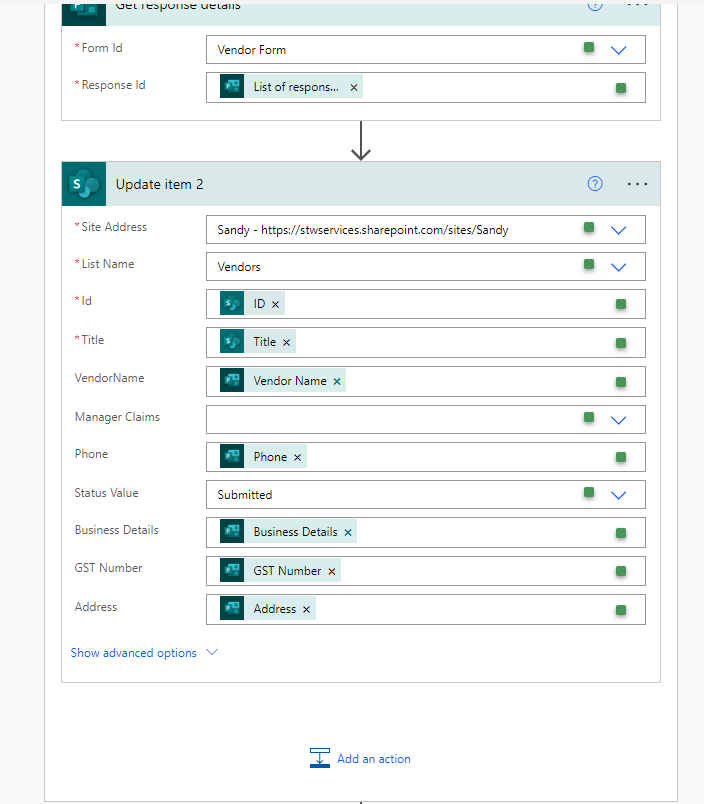
Then add new setup under apply to each section to update form which vendor will submit. and map columns like –
Site Address – Sandy (as per my local environment you can update according to your environment)
List Name – Vendors
Id – ID (select ID using dynamics content under when item is created section)
Title – Title (select Title using dynamics content under when item is created section)
Vendor Name– Vendor Name (select Vendor Name using dynamics content under when the item is created section)
Vendor Phone – Vendor Name (select Phone using dynamics content under when the item is created section)
Status Value – ‘Submitted’
Business Details – Vendor Name (select Business Details using dynamics content under when the item is created section)
GST Number – Vendor Name (select GST Number using dynamics content under when the item is created section)
Address– Vendor Name (select Address using dynamics content under when the item is created section)
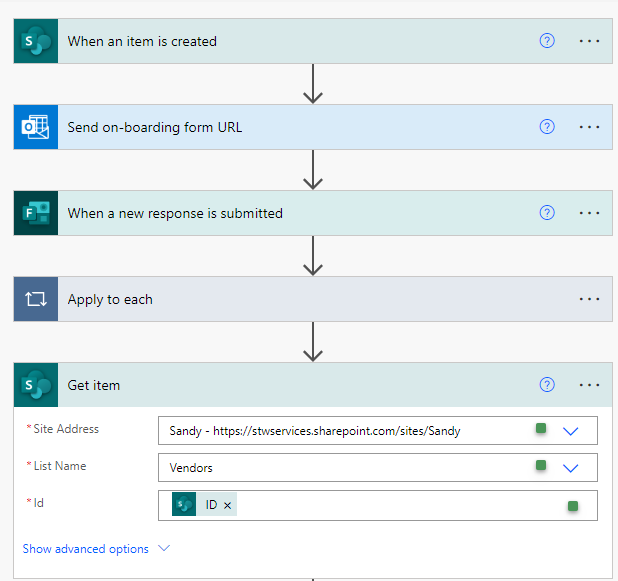
Once you update an item in the SharePoint Vendor list by data submitted by the Vendor using Vendor form. It’s time to fetch data back so it can be utilized in approval submission.
Add an action Step ‘Get Item’ from SharePoint connectors. Add details in input fields –
Site Address – Sandy (as per my local environment you can update according to your environment)
List Name – Vendors
Id – ID (select ID using dynamics content under when item is created section)
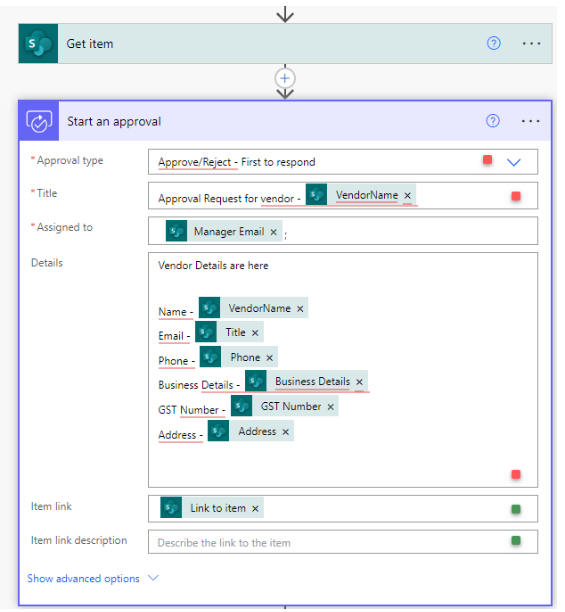
Now add approval action step using action ‘Start and wait for an approval’. Add inputs as given below –
Approval Type – ‘Approve/Reject – First to response’
Title – Approval Request for Vendor – Vendor Name (This title you can use as per your approval process and dynamics content using pick from ‘Dynamics content’ box from section ‘Get Item’)
Assign To – Add Email address of manager who will approve it.
Details – (You can add details as per requirement which needs to be send to manager for approval for example we are using sample details like given below) –
Vendor Details are here
Name – @{body(‘Get_item’)?[‘VendorName’]}
Email – @{body(‘Get_item’)[‘Title’]}
Phone – @{body(‘Get_item’)?[‘Phone’]}
Business Details – @{body(‘Get_item’)?[‘BusinessDetails’]}
GST Number – @{body(‘Get_item’)?[‘STWNumber’]}
Address – @{body(‘Get_item’)?[‘Address’]}
Video Link – https://youtu.be/127Bm-oNrBg
Vendor Approval Process Using Microsoft Power Automate and SharePoint list – Part 2