
Approval Process using Power Automate for Businesses
We will create a sample approval process in this chapter which will give an overview of how you can create your own approval processes in your business. We will first create a SharePoint list.
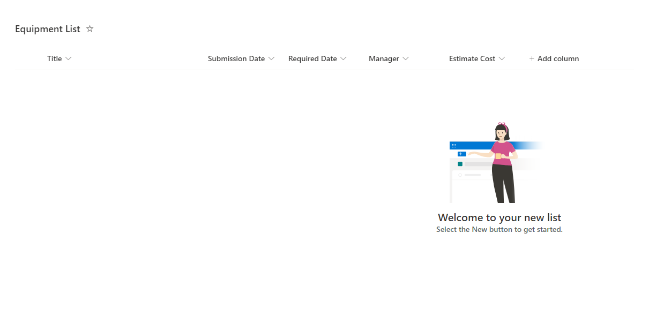
Building the SharePoint List
For example, we will create an Equipment List. We add columns ‘Submission Date’, ‘Required Date’, ‘Manager’, ‘Estimated Cost’, etc. We also add a Status column and use default to ‘Submitted’. And then set via Power Automate to either Approved or Rejected based on the approval results.
Creating the Power Automate Flow
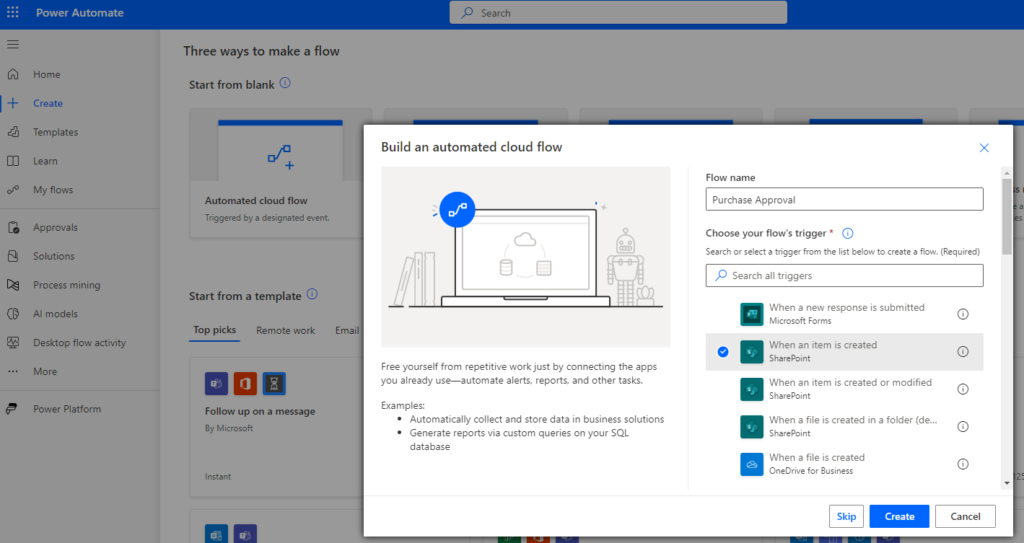
Create an Automated cloud flow. So, it will run automatically when triggered by an event. Select a trigger ‘when a item is created’.
Select SharePoint site and then select the Equipment List from the list in step of ‘When an item is created’.
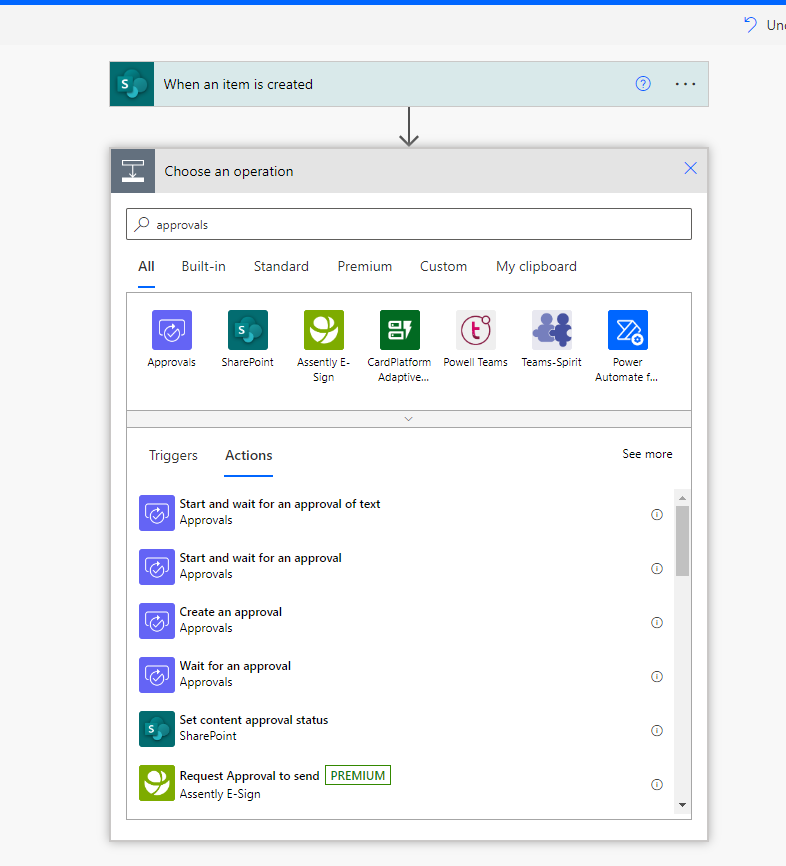
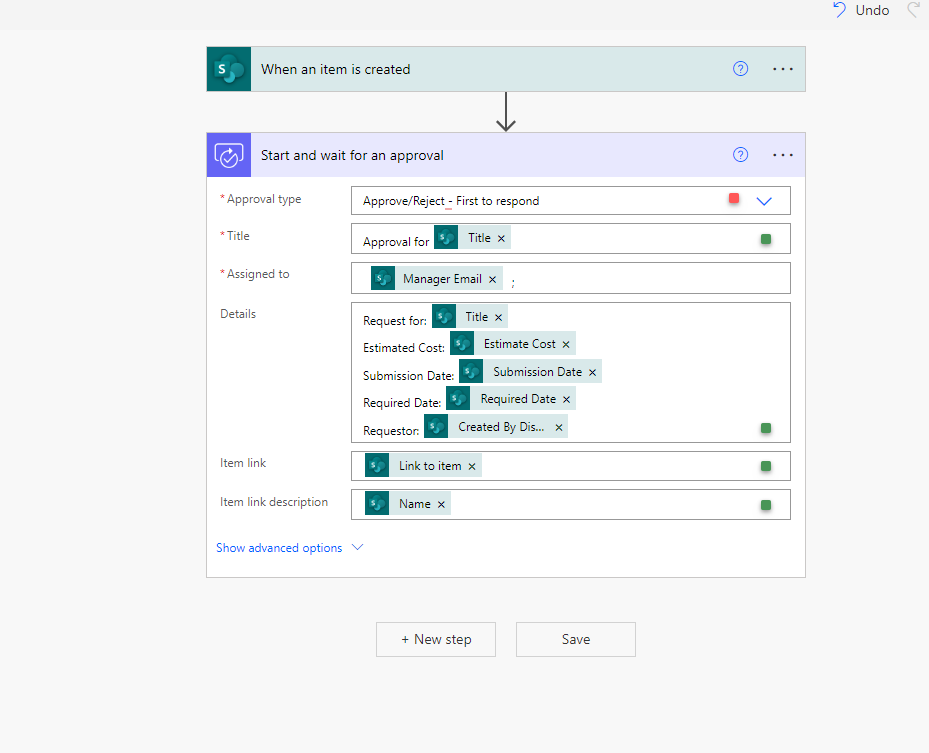
Our next step is to select Approvals (you can search to find it) and then choose ‘Start and wait for approval’.
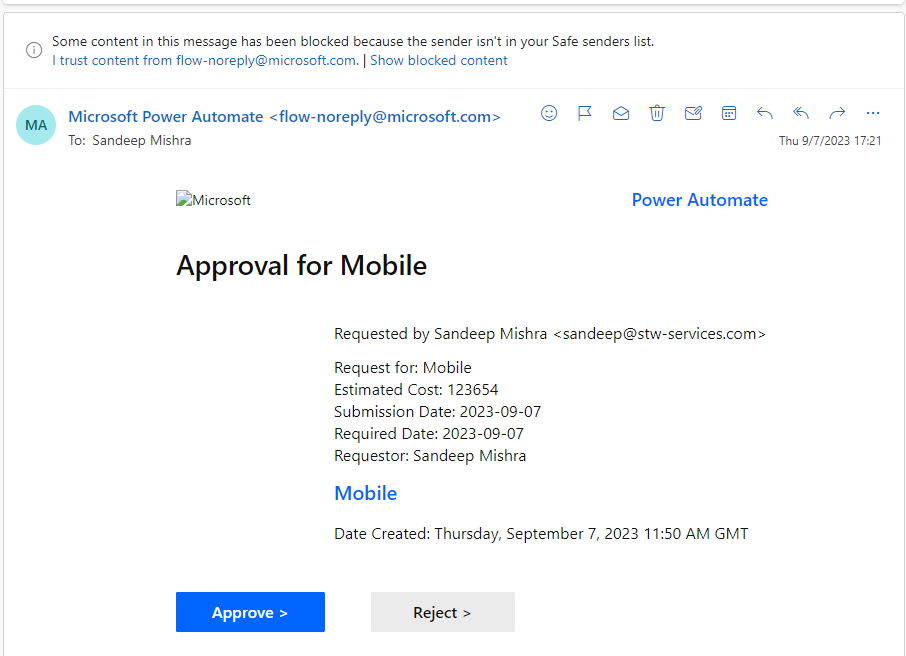
Since we are only doing a single approval for the manager, we can choose to select the ‘First to Respond’ or ‘Everyone Must Respond’. One of the great things about Power Automate is that it offers up what information is available when you select Add dynamic content. We include the list item ‘Title’ column as part of the approval title and then choose the ‘Manager Email’ for the Assigned to value.
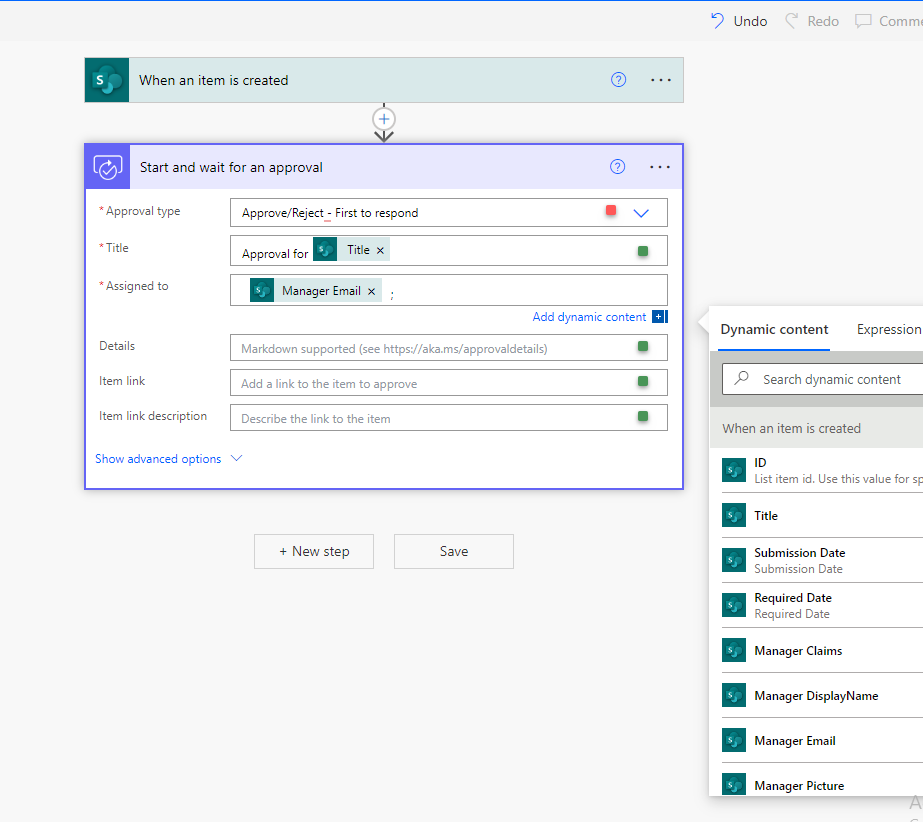
Notice all the information that we include in the Details. This avoids the need for the approver to go back to the original SharePoint list item unless they need still more data, though the link to the list item makes the original request just a click away.
For example, you can set columns like this –
Title – Approval for ‘Title’
Assigned To – Manager Email’
Details – Request for: ‘Title’
Estimated Cost: ‘Estimated Cost’
Submission Date: ‘Submission Date’
Requested Date: ‘Requested Date’
Requestor: ‘Created by Display Name’
Item Link: ‘Link to Item’
Item Link Description: ‘Name’
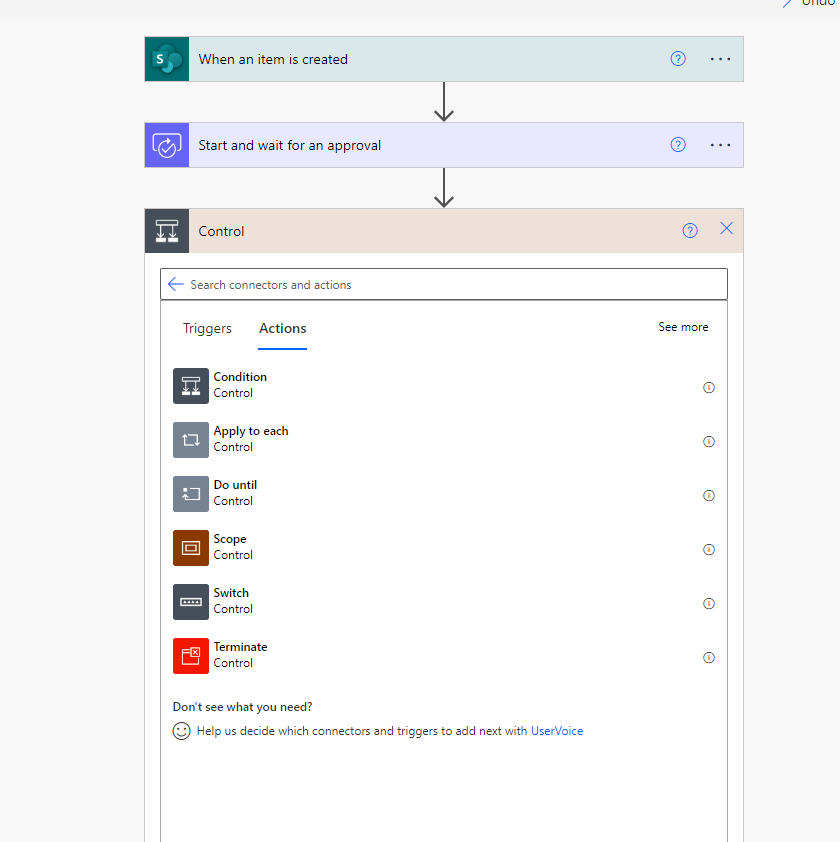
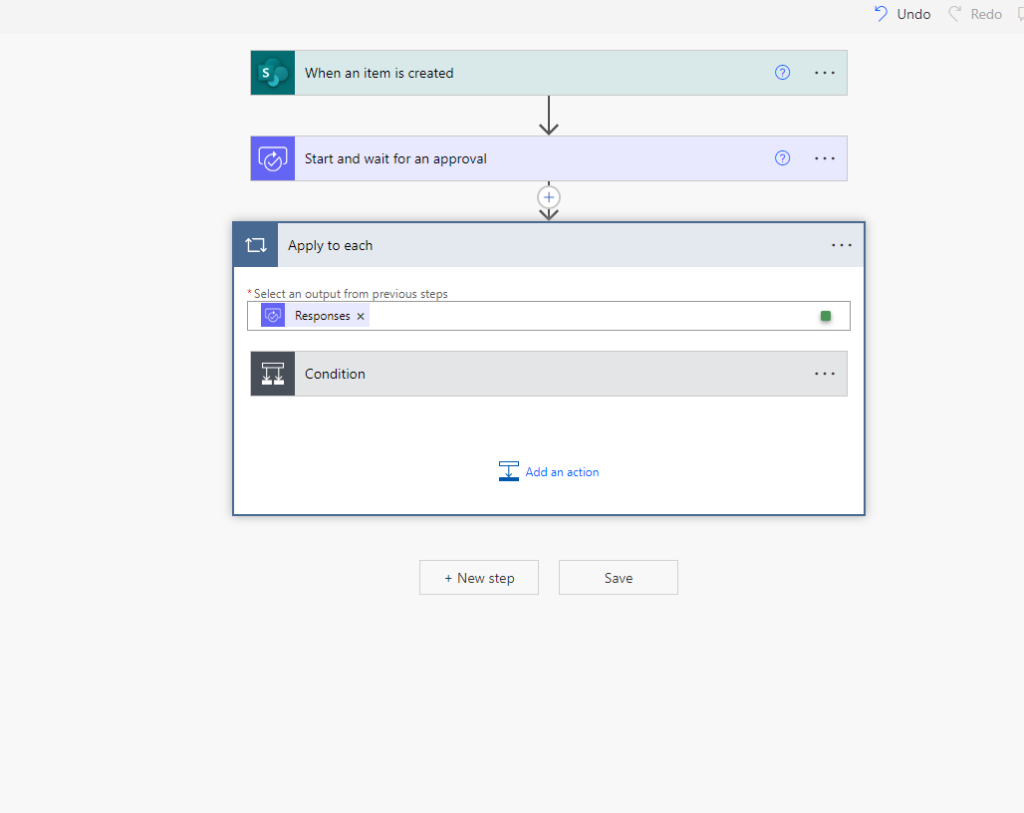
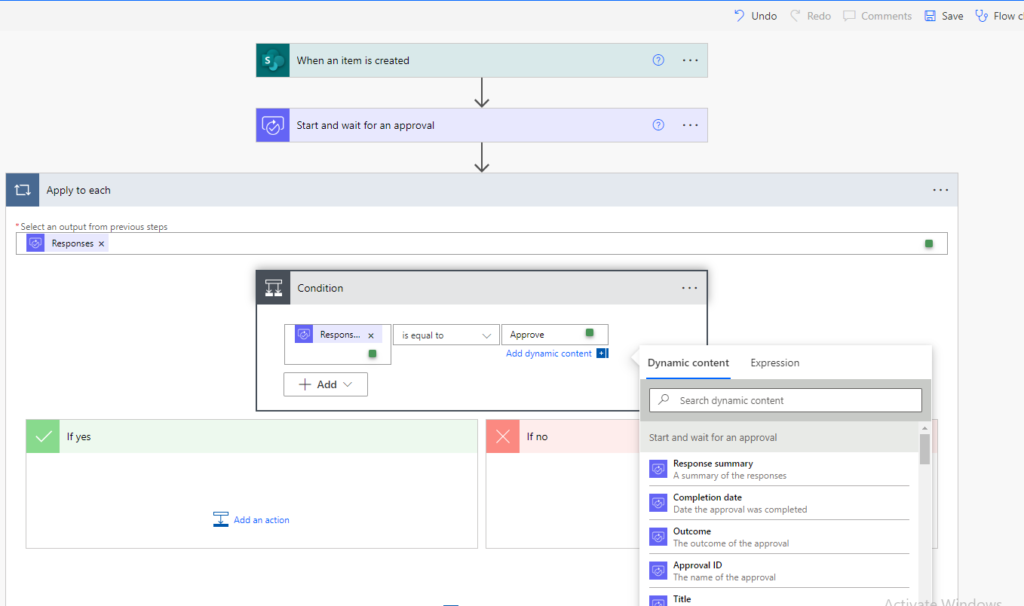
Our next step is to do some logic based on what the approver decides. We add a new step and select Control and then Condition.
Then in condition choose value select ‘Responses Approver response’.
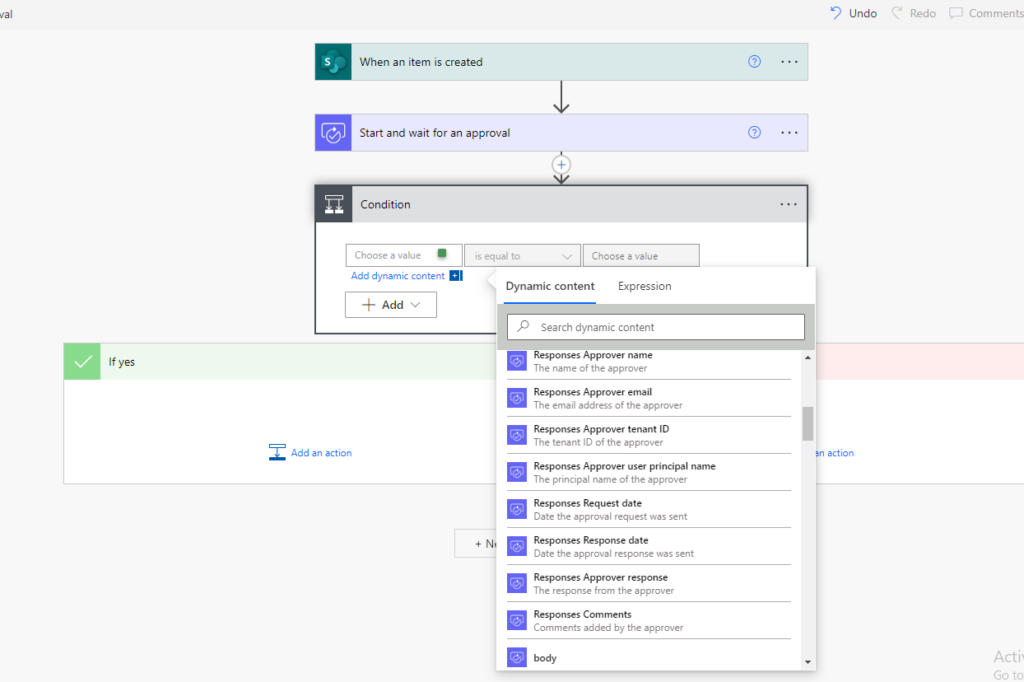
As soon as you select responses it will convert in apply to each control along with conditions as well. It will consider multiple responses.
Now in condition select in choose value ‘Response’ is equal to Approve for true condition. And if it is disapproved then it will go in false condition.
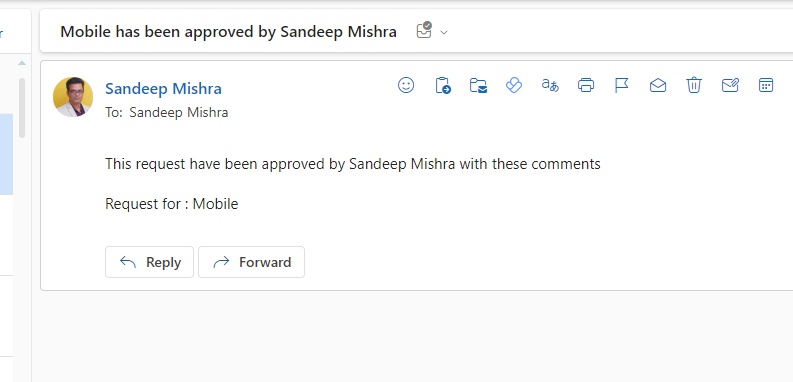
In ‘If Yes’ condition we want to send an email based on the approval result. We use Office 365 Outlook and then the ‘Send an email (V2)’ method.
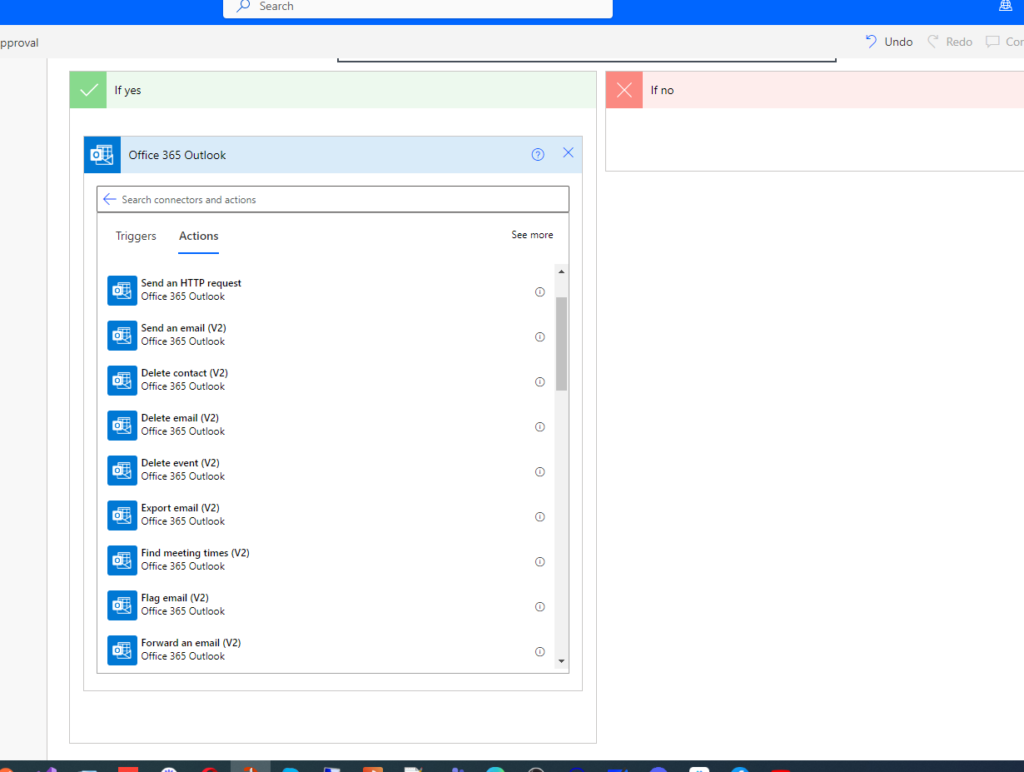
As with the preceding approval request, we use information from the SharePoint list item to populate the emails. We also use data from the approval such as the name and the Response Comments.
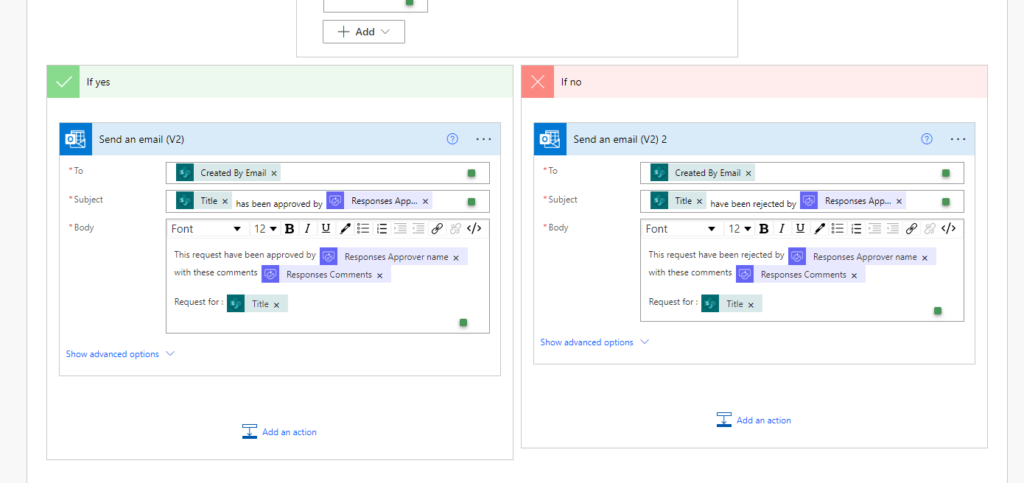
For approval email example setup is –
To – ‘Created By Email’
Subject – ‘Title’ is approved by ‘Responses Approver Name’
Body – This request has been approved by ‘Response Approver Name’
with comment ‘Reponses Comment’
Request for ‘Title’.
For disapproved email example setup is –
To – ‘Created By Email’
Subject – ‘Title’ is rejected by ‘Responses Approver Name’
Body – This request has been rejected by ‘Response Approver Name’
with comment ‘Reponses Comment’
Request for ‘Title’.
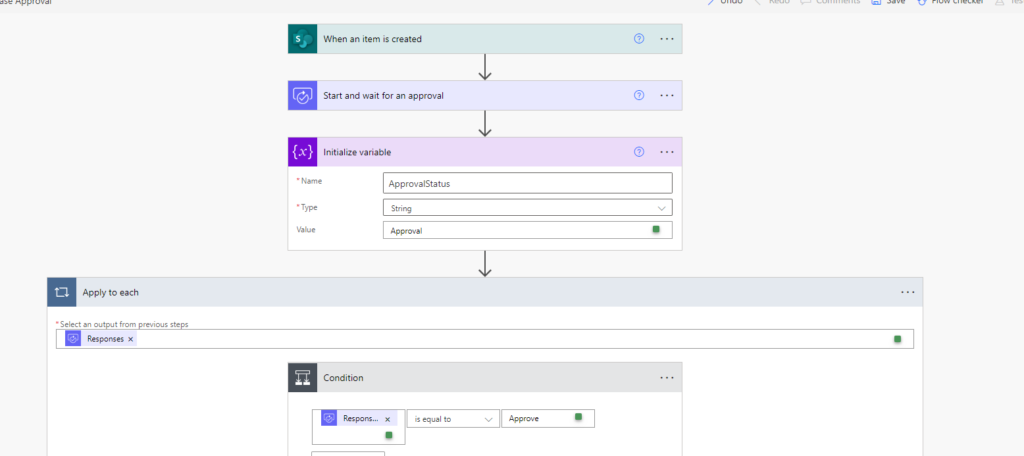
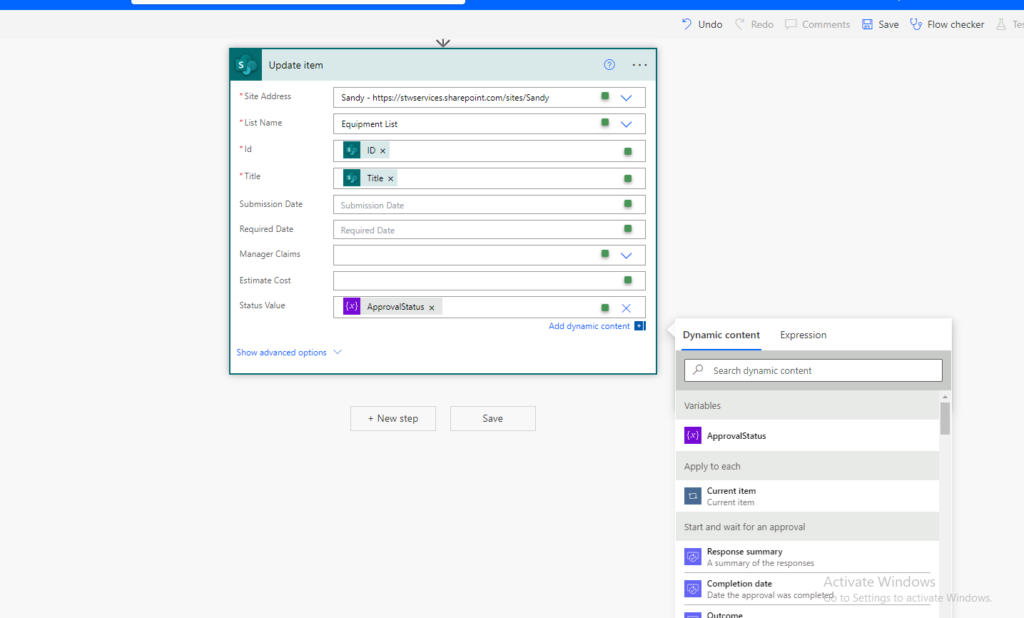
To update SharePoint list with a status we need a variable before our approve disapprove condition so add the step above apply to each condition which is holding approve disapprove condition.
Add step ‘Initialize Variable’
Name – ‘‘ApprovalStatus’’
Type – ‘String’
Value – ‘Approval’
We are now ready to update our list item with the value of the ‘ApprovalStatus’ variable. We use the Update item method, select our site and list name, and then choose the associated ID and Title.
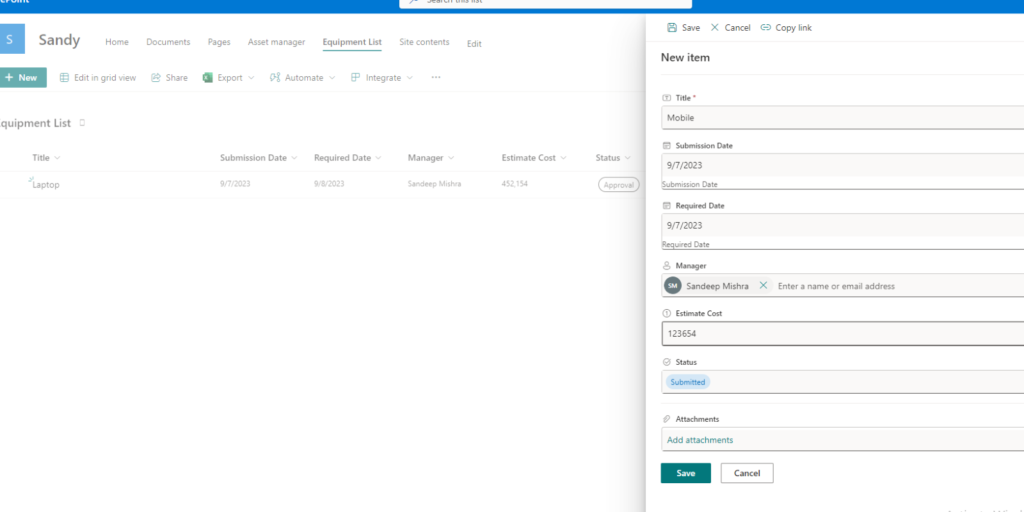
Testing the Flow, We add a new item in SharePoint and wait for the fun to begin.
We quickly get a notification in Teams; we get both a popup notification and an entry in our Activity Feed
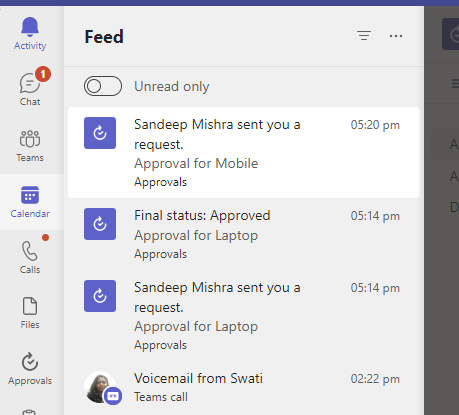
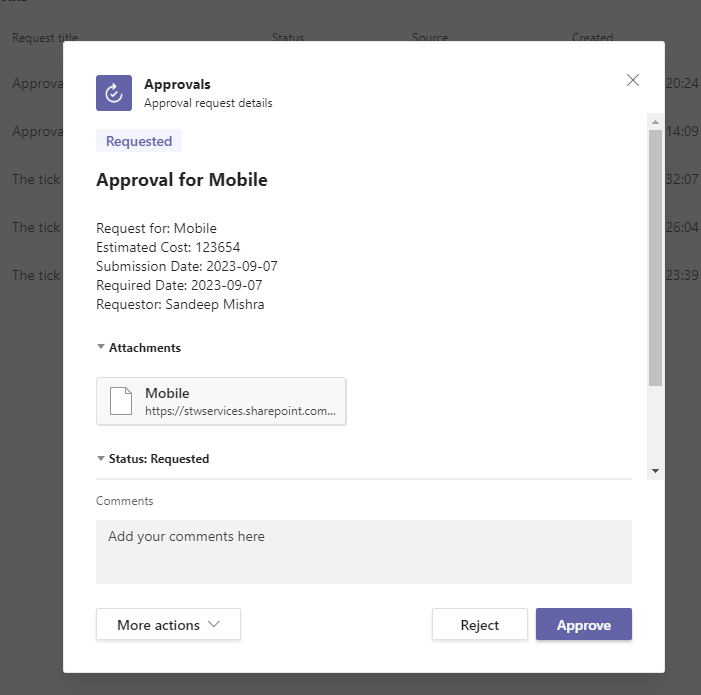
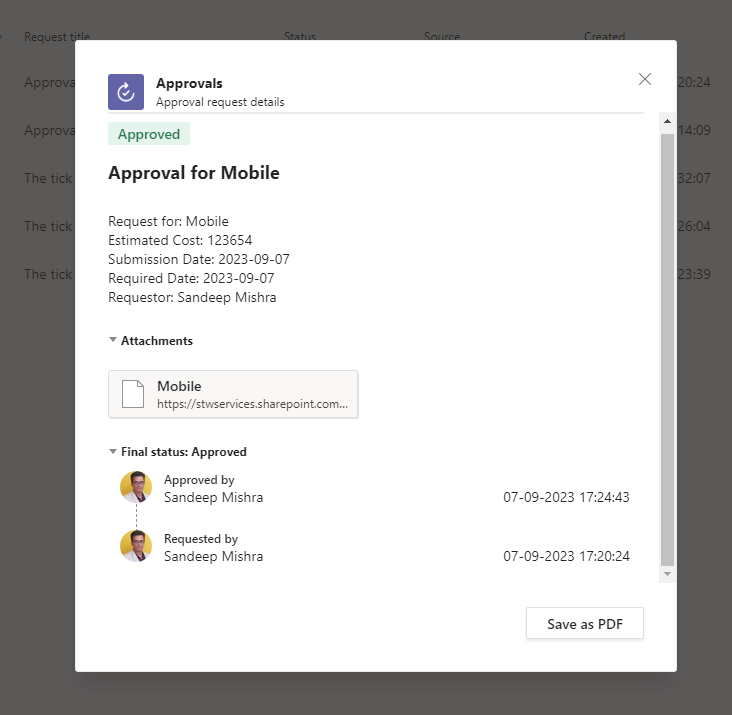
Click on the notification or go to the Approvals app in Teams, we see the form shown in notification list. Notice how all the elements shown back in displayed: Request, Description, Estimated Cost, etc.
The link to the SharePoint list item is listed as the attachment. It gives the approver a spot to enter comments and then the ability to either Approve or Reject.

Although it all seemed to work, it is still a good idea to go back to Power Automate, see if the run was successful, and then click on it to view its status. This is even
Summary
In this article, we created an approval workflow whenever a SharePoint list item was created. We sent the approval to the manager listed in the SharePoint list item/entry form and included the relevant information about the request. We then sent either an approval or rejection email to the submitter of the request