Author: STW Services LLP

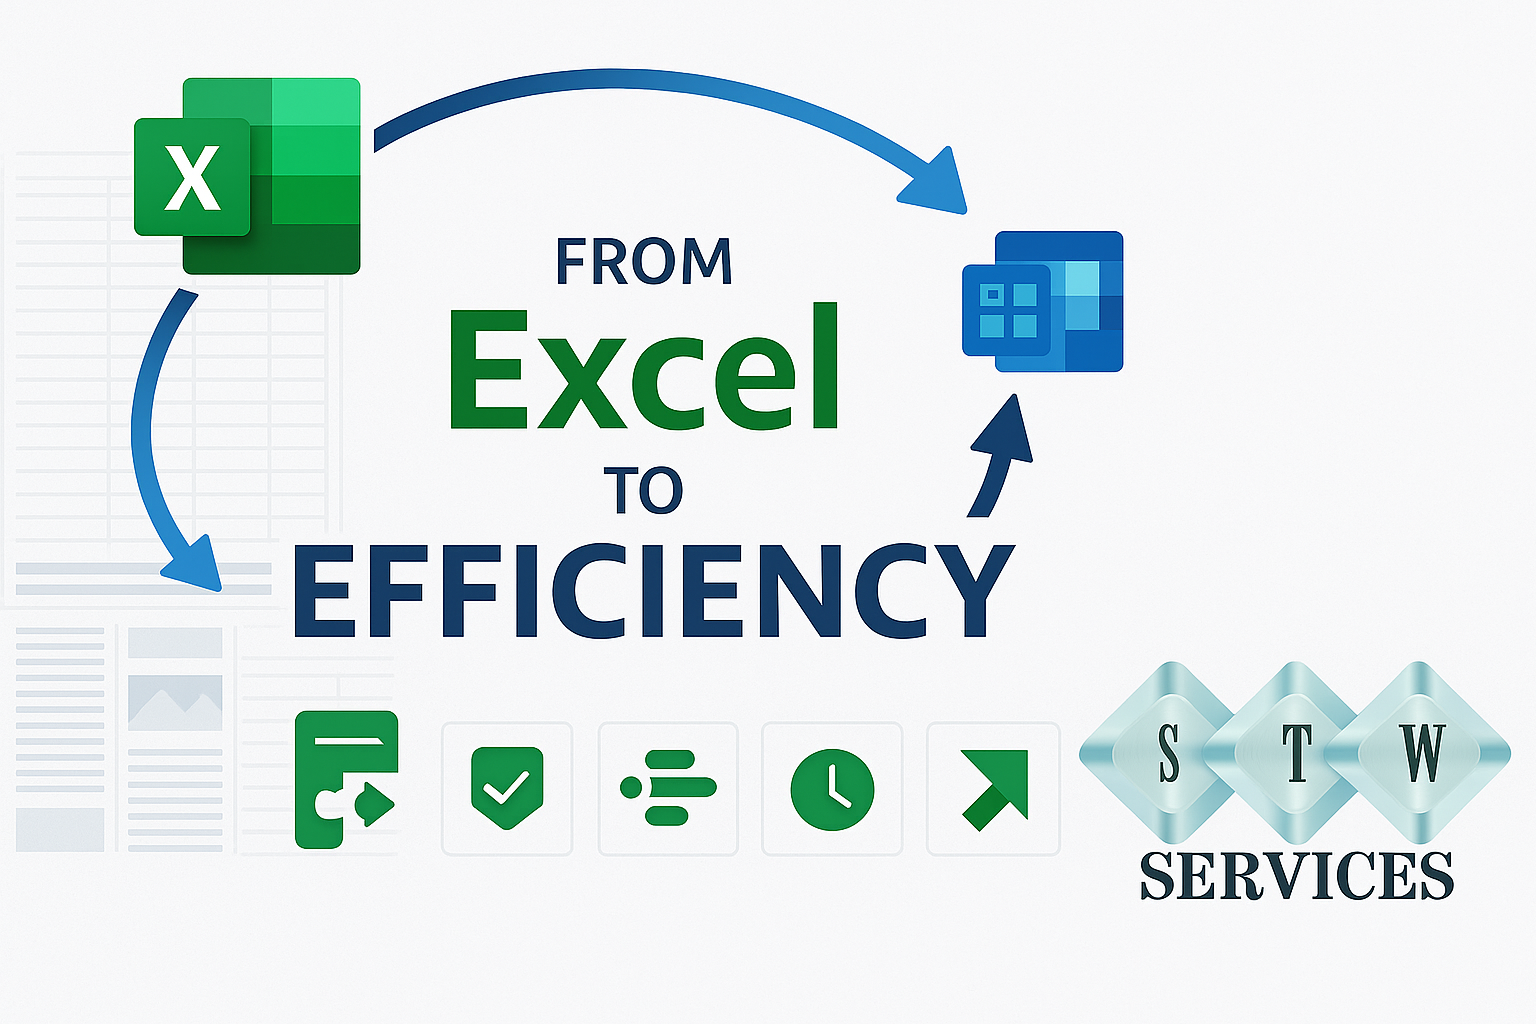
  • From Excel to Efficiency: How a Florida Construction Giant Transformed Operations with Microsoft Project Operations

    From Excel to Efficiency: How a Florida Construction Giant Transformed Operations with Microsoft Project Operations

    Introduction

    In the construction industry, where timelines are tight and coordination is everything, having the right tools to manage operations can make or break a project. For years, one of Florida’s leading construction companies managed their entire business on Microsoft Excel. While it worked on the surface, it was far from ideal.

    Excel was their go-to tool for tracking tasks, budgets, timelines, and resources. But as the business grew, so did the chaos. Teams were often working on outdated files, key updates got lost in email threads, and collaboration across departments felt like pulling teeth.

    Everything changed when they introduced Microsoft Teams to streamline communication—and realized what it felt like to have everything in one place. That “aha” moment set them on a journey that ultimately led to Microsoft Project Operations.

    The Problem with Excel

    Let’s face it—Excel is a powerful tool, but it’s not built for managing large, dynamic construction projects. The Florida-based company faced a number of challenges using spreadsheets:

    • Multiple Versions: Teams were constantly sending Excel files back and forth, never quite sure who had the most updated version.
    • Manual Errors: Simple mistakes in formulas or data entry led to inaccurate forecasts and scheduling issues.
    • Zero Real-Time Visibility: Leadership had no easy way to see the real-time status of projects across locations.
    • Poor Collaboration: With no centralized platform, field teams and office staff were often out of sync.

    Despite all this, the company made it work—until they saw what modern tools could really do.

    Why Change—Even When Owners Resist?

    It’s common in the construction industry for owners or senior leaders to resist change. After all, if projects are still being delivered and revenue is coming in, why fix what isn’t “broken”?

    But here’s the reality: what works today may not scale tomorrow. In this case, the leadership initially questioned the need to move away from Excel. But once they experienced the power of Microsoft Teams—even for just communication—they realized the inefficiencies that had been accepted as “normal” for years.

    Change can be uncomfortable, especially when it means learning new systems. But in a world where time, coordination, and visibility are critical, embracing digital tools like Microsoft Project Operations is no longer optional—it’s a competitive advantage.

    The Shift to Microsoft Ecosystem

    It started small. By introducing Microsoft Teams, communication instantly improved. Staff could chat, share documents, and collaborate live instead of sifting through email chains and scattered files.

    Encouraged by the results, the leadership team asked: What else can Microsoft do to help us work better?

    That’s when they discovered Microsoft Project Operations—a comprehensive project management platform designed for service-based and project-driven businesses. Once they dove in, the benefits were immediate and transformative.

    The New Workflow

    Today, the company manages its entire project lifecycle using Microsoft Teams, Power Automate, and Project Operations. Here’s how it changed the game:

    • Task Automation: Repetitive tasks are now handled through automated workflows.
    • Centralized Dashboards: All project data—from budgets to timelines—is visible in real time.
    • Resource Management: Assigning teams, tracking availability, and managing workloads is now effortless.
    • Improved Communication: Field workers and office staff are fully aligned through integrated updates and file sharing.
    • Faster Decision Making: With real-time reports and forecasting tools, the leadership team can make quicker, smarter decisions.

    Conclusion

    Switching from Excel to Microsoft Project Operations wasn’t just a software upgrade—it was a strategic transformation. The Florida construction company now runs its business more efficiently, with better visibility, stronger collaboration, and fewer manual errors.

    Digital change isn’t always easy—but it’s necessary. For owners who hesitate, the value lies not just in technology—but in the time saved, the mistakes avoided, and the profits protected. When teams spend less time managing chaos, they spend more time building success.

    If your construction business is still stuck in spreadsheets, it’s time to rethink the tools you use to build your future. Microsoft Project Operations may be the missing piece in your path to growth.
  • Automate Reimbursement Approvals with Microsoft Forms, Power Automate & Excel

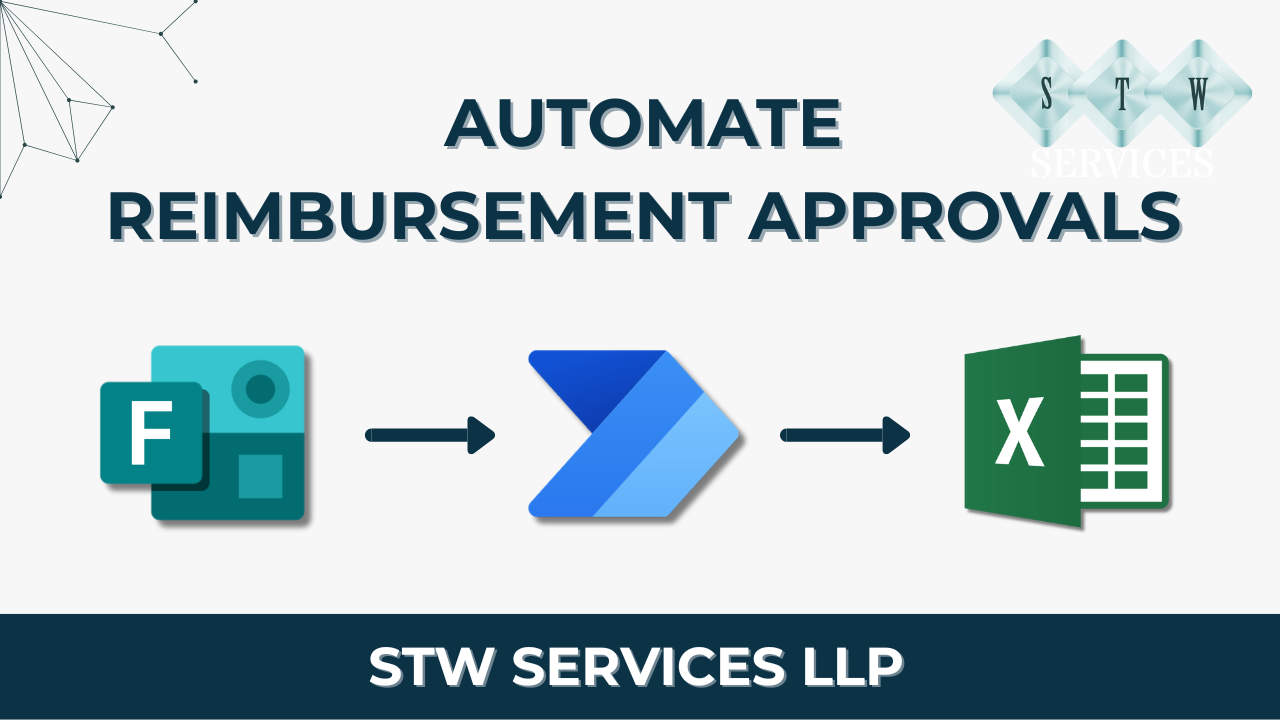
    Automate Reimbursement Approvals with Microsoft Forms, Power Automate & Excel

    Introduction

    Managing employee reimbursements manually? You’re not alone. Many finance teams still rely on email threads, spreadsheet juggling, and back-and-forth approvals that waste valuable time and increase the risk of errors.

    But what if you could automate the entire reimbursement approval process—from collecting claims to logging approved entries in Excel—without writing a single line of code?

    In this blog, we’ll walk you through a practical, step-by-step solution using Microsoft Forms, Power Automate, and Excel Online. By the end, you’ll have a fully automated system where employees submit claims through a form, finance receives approval requests instantly, and approved claims are automatically logged into a centralized Excel file for processing.

    Let’s make your finance workflow faster, smoother, and error-free.

    Prerequisites

    You’ll need a Microsoft 365 account and access to the following:

    • Microsoft Forms
    • Power Automate
    • OneDrive or SharePoint
    • Excel Online
    • An Excel sheet with a table
    • A Microsoft Form for collecting reimbursement requests

    Step-by-Step Guide

    First things first, head over to Microsoft Power Automate. You’ll find hundreds of ready-to-use templates there—we’ll use one of them to build our reimbursement approval flow.

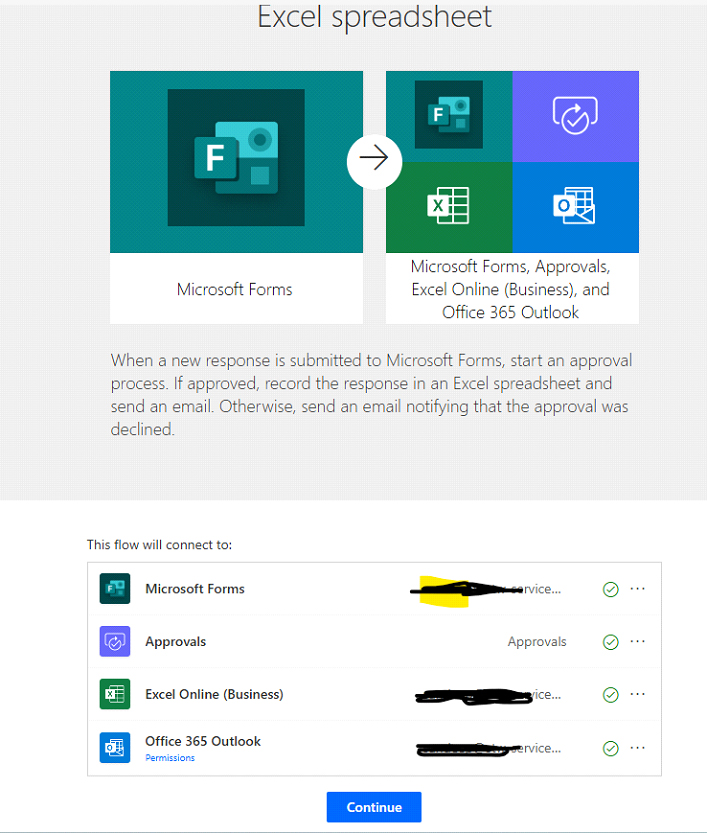
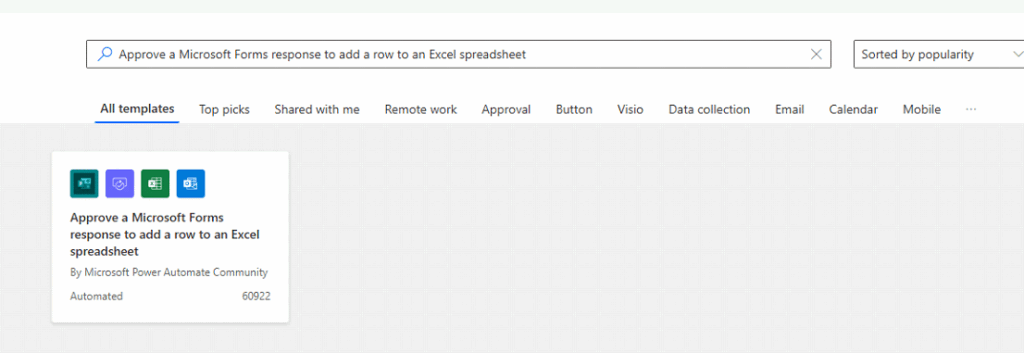
    Search for this template:

    “Approve a Microsoft Forms response to add a row to an Excel spreadsheet”

    Search this template you will get result-

    But before using this template, let’s prepare the Microsoft Form and Excel sheet required to set up this flow.

    To go https://forms.office.com/ and click on create new form and add these fields to create a form use title it: “Reimbursement Claim Form” or what ever depends on your business need.

    Add the following fields (example):

    • Full Name
    • Department
    • Expense Type
    • Amount
    • Date of Expense
    • Comments
    • Status (Approved/Rejected)
    • Approval Date

    Select the range and click Insert → Table. Name the table as ClaimsTable.

    Now go back to template and select template make sure all app connection or okay like this.

    Check the connection for Microsoft Form, approval, Excel online, and Office 365 Outlook. If all connections are okay, click on continue or fix the connection issue using your Microsoft login.

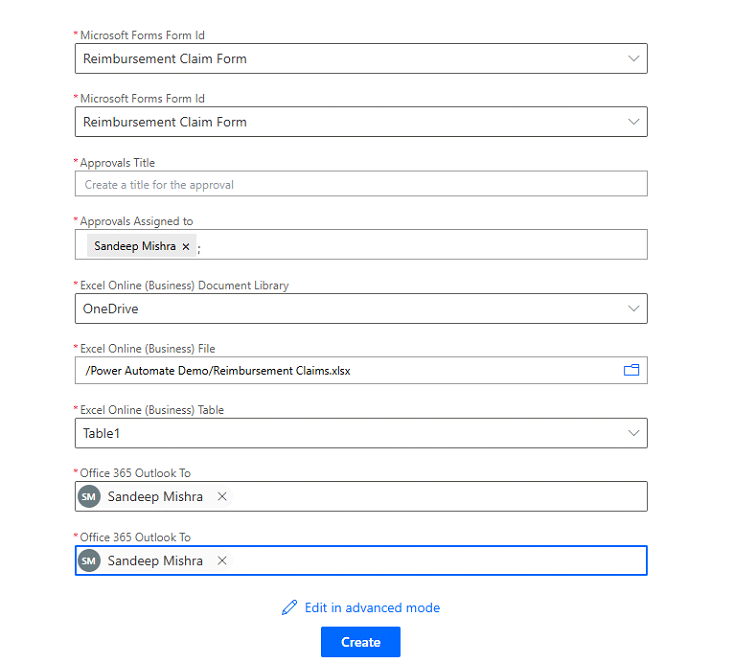
    Once you click on continue, it requires all details to be filled in in the next step. Fill details like form ID, Excel path and table, also the person who will approve/ disapprove the request, like given example:

    Once filled click on continue and your flow will be read.

    Testing:

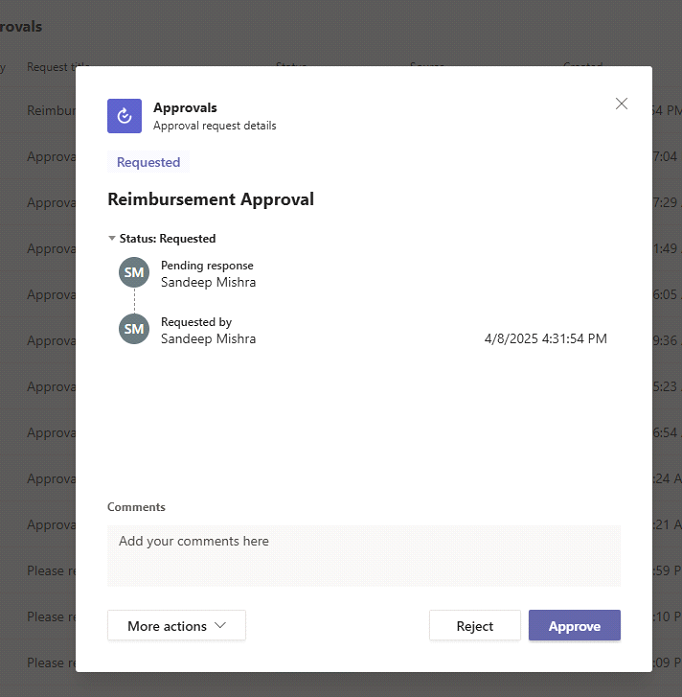
    Click on Test in the top right-side bar and fill out the Microsoft form and submit it. You can see an approval/disapproval request in Microsoft Teams like this:

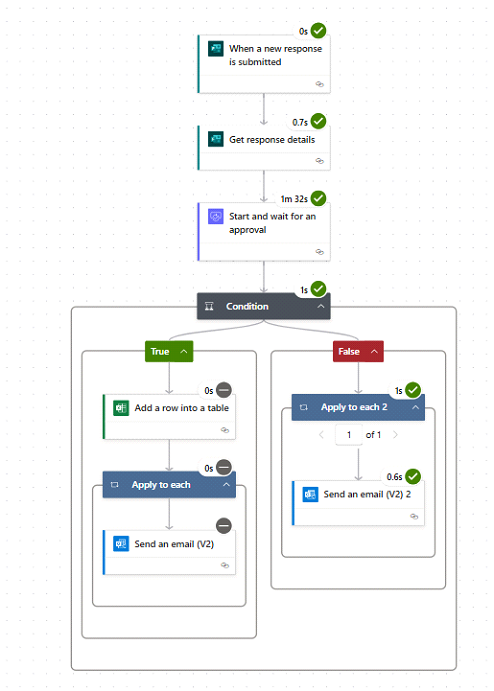
    Your action will run accordingly. Wow, the flow is running fine.

    Conclusion

    With just a few simple tools—Microsoft Forms, Power Automate, and Excel Online—you can completely transform how your finance team handles reimbursement claims. What once required manual emails, approvals, and spreadsheet updates can now be streamlined into an automated, error-free workflow.

    Not only does this save valuable time, but it also improves transparency, speeds up approvals, and ensures that no request falls through the cracks.

    Ready to go further? You can enhance this setup by integrating notifications in Microsoft Teams, tracking metrics in Power BI, or adding file uploads for receipts. The possibilities with Power Platform are endless!

    Start small, automate one process, and you’ll quickly see the impact across your entire organization.

  • Design Video List Component : Part 6

    Design Video List Component : Part 6- Create a components folder in src folder and add VideoList.js file in it, open this file and start importing component

    1. import React, { Component } from ‘react’;
    2. import { View, Text } from ‘react-native’;
    3. import CardWrapper from ‘../common/CardWrapper’;
    4. import CardInner from ‘../common/CardInner’;
    5. class VideoList extends Component {
    6. render() {
    7. return (
    8. <View>
    9. <CardWrapper>
    10. <CardInner>
    11. <Text>For Title</Text>
    12. </CardInner>
    13. <CardInner>
    14. <Text>For Image</Text>
    15. </CardInner>
    16. <CardInner>
    17. <Text>For Button</Text>
    18. </CardInner>
    19. </CardWrapper>
    20. </View>
    21. );
    22. }
    23. }
    24. export default VideoList;

    So here we created a base design for video listing. No further we will call this component in a file Index.js and pass props of playlist id id from index.js and get it on VideoList.js

    If we will keep Play list id from Parse code of VideoList , That will be easy for us to change any time Play List id of youtube and easily we can list any playlist by a quick change


    So Now we are going to create Index.js in same component folder. And Add

    1. import React, { Component } from ‘react’;
    2. import { View } from ‘react-native’;
    3. import VideoList from ‘./VideoList’;
    4. class Index extends Component {
    5. render() {
    6. return (
    7. <View>
    8. <VideoList playlistid=’LLA34Z3lq8FozSQzDHsSLcmQ’ />
    9. </View>
    10. );
    11. }
    12. }
    13. export default Index;

    In this code I imported VideoList component and called it in view component of Index component. You can see I am passing playlistid as props in VideoList component. It is same process which I did in Header Component

    Now further we are going to get this playlistid props on VideoList component and print it in console to see what is result

    So now we will call Index component in our main App.js file so we can see what is result when app load

    So open App.js and import Index component

    1. import Index from ‘./src/components/Index’;

    Now remove Text component


    <Text> Youtube Video </Text>

    And add Index component

    <Index />

    So now its time to refresh simulator again and check what is result .

    Great!! We did .

    Now we will run debugger in simulator to check our props . So we will call console.log in render method of VideoList.js.

    So to run debugger in chrome press command + M button. And select Debug Js Remotely

    http://localhost:8081/debugger-ui/ this url will open in chrome. Right click in chrome and open inspect

    Click on console

    Now we will console.log(this.props.playlistid); in render() { method of VideoList.js

    So code will be like this

    ……
    class VideoList extends Component {

     render() {

       console.log(this.props.playlistid);

       return (

    …….

    Now its time to refresh simulator and check chrome console you will see same playlist id which we passed in props

    🙂

    Well , we are getting play list id of youtube 

  • Process to call state values : Part 8

    Process to call state values : Part 8 – To run all array as loop using our CardWrapper and CardInner, We will use map function . map() will run our design and place value of each array items untill it is null

    So it will not be a good idea to write a code in return . I think we should make a helper function and use map and CardWrapper and CardInner component in this function and then call this function in return function.

    So create a funtion before render() function of VideoList component

    1. renderthumbnails() {
    2. return this.state.videos.map(video =>
    3. <CardWrapper key={video.id}>
    4. <CardInner>
    5. <View>
    6. <Text>{video.title}</Text>
    7. </View>
    8. </CardInner>
    9. <Image
    10. resizeMode={Image.resizeMode.cover}
    11. style={{ height: 280, width: null }}
    12. source={{ uri: video.thumbnail }}
    13. />
    14. <CardInner>
    15. <Text>{video.id}</Text>
    16. </CardInner>
    17. </CardWrapper>
    18. );
    19. }

    Now you can see in above code we are using Image component in card so go on top and we will import Image component from react-native so change import line like this

    1. import { View, Text, Image } from ‘react-native’;

    Now we are ready with our design and listing function so next step is to call this function in return. To call this function we will use curly braces using view component.

    So in return please remove all cardWrapper and CardInner code and  add code like this, we have already called these component in renderthumbnails function

    1. …..
    2. return (
    3. <View>
    4. {this.renderthumbnails()}
    5. </View>
    6. );
    7. ………

    Now refresh simulator and check result .. you can see all data with title image and video id

    But you can see page scroll is not working. So to fix this we will use <ScrollView> component

    Calling ScrollView component

    First import ScrollView from react-native so add ScrollView on top

    import { View, Text, Image, ScrollView } from ‘react-native’;

    And now add ScrollView in View so

    1. …….
    2. <View>
    3. <ScrollView>
    4. {this.renderthumbnails()}
    5. </ScrollView>
    6. </View>
    7. ……..

    Now scroll will work , check it by refreshing Simulator

    In Place of button i have called video ID . Now in further code we will create a button component in common folder and use it and then call video id on press to send to new screen .

  • Create a button component : Part 9

    To create a button component we will add new file in common folder of src. Button.js

    We will import React and Component from react and

    Text and TouchableOpacity from react-native

    Touchable opacity so some animation on press so we will use this and later we will call onPress funtion to navigate on another page to view video.

    So create Button.js file with this code

    1. import React, { Component } from ‘react’;
    2. import { Text, TouchableOpacity } from ‘react-native’;
    3. class Button extends Component {
    4. render() {
    5. return (
    6. <TouchableOpacity>
    7. <Text>View</Text>
    8. </TouchableOpacity>
    9. );
    10. }
    11. }
    12. export default Button;

    Now our button code is ready and we will call this button in VideoList helper fuction where we are calling video id in place of button

    So open VideoList.js

    Import button component import Button from ‘../common/Button’;

    Go to last CardInner component of helper function renderthumbnails() and replace Text with Button component

    Now refresh simulator and you will see view text there which we were added in Button component

    Now we are going to process button design so open Button.js and add some styling

    Styling of Button component

    1. const styles = {
    2. buttonstyles: {
    3. flex: 1,
    4. alignSelf: ‘stretch’,
    5. borderRadius: 4,
    6. borderColor: ‘#000’,
    7. borderWidth: 1,
    8. backgroundColor: ‘#ff0000’
    9. },
    10. buttonTextstyle: {
    11. fontSize: 16,
    12. color: ‘#FFF’,
    13. paddingTop: 10,
    14. paddingBottom: 10,
    15. alignSelf: ‘center’,
    16. fontWeight: ‘600’
    17. }
    18. };

    Now call these styles in TouchableOpacity and Text of Button component

    1. return (
    2. <TouchableOpacity style={styles.buttonstyles}>
    3. <Text style={styles.buttonTextstyle}>View</Text>
    4. </TouchableOpacity>
    5. );

    Now refresh simulator and you will see button style is changed to red

    Now we need to pass Button pass a props when Button component is pressed . When we press button then a props should be pass to TouchableOpacity on press. Button component press will not work on press until we add press function on TouchableOpacity so

    So add

    1. <TouchableOpacity onPress={this.props.onPress} style={styles.buttonstyles}>
    2. <Text style={styles.buttonTextstyle}>View</Text>
    3. </TouchableOpacity>

    Now we can make button text more editable so anyone can easily change where they call <Button /> component so we will add children same as we did for Cards components

    1. <TouchableOpacity onPress={this.props.onPress} style={styles.buttonstyles}>
    2. <Text style={styles.buttonTextstyle}>{this.props.children}</Text>
    3. </TouchableOpacity>

    So now button can be called with desired button text like this

    <Button> Button Text Here </Button>

    So Open VideoList.js and change button like this

    <Button>

    View

    </Button>

    Now please reload Simulator and check design

    So page is ready to display with all video listing. In further process i am going to use navigation to play video on new page with id.

  • Calling component by navigation props : Part 12

    Calling component by navigation props- So first open App.js . In this file we have called Index component so now we will call this using navigation here

    So make a function renderIndex before render() function and call it in return

    1. renderIndex() {
    2. this.props.navigation.navigate(‘Index’);
    3. }

    And in return () function after header component replace <Index /> with

    1. { this.renderIndex() }

    So now our Index component from Index.js component will load by navigator

    So remove import Index from ‘./src/components/Index’; from this App.js

    Now we will do same for VideoList component which is called in Index.js

    So again i will create a function in components/Index.js file

    1. renderVideoList() {
    2. this.props.navigation.navigate(‘VideoList’, {
    3. playlistid: ‘LLA34Z3lq8FozSQzDHsSLcmQ’
    4. });
    5. }

    And now i should replace VideoList with this function

    1. { this.renderVideoList() }

    And remove import from this file 

    import VideoList from ‘./VideoList’;

    Here you can see I am passing a props of playlistid which i will get on VideoList page like this now

    Find this line

    const playerid = this.props.playlistid

    & change with

    1. const playerid = this.props.navigation.state.params.playlistid

    To get navigation props value we use this.props.navigation.state.params.propsname

    Now in further step we will make a new page to play video and link that page to this navigation . After linking this page to navigation we will call that page on button click and pass a props as video id . After that on View video page we will display video by youtube video id

  • Creating component to display video : Part 13

    Creating Component To Display Video – So I added further now we wil make a new file in components folder ViewVideo.js

    Now we will start adding code in that so first import React and Component

    1. import React, { Component } from ‘react’;
    2. import { View, Text } from ‘react-native’;
    3. class ViewVideo extends Component {
    4. render() {
    5. return (
    6. <View>
    7. <Text>We will play video here…</Text>
    8. </View>
    9. );
    10. }
    11. }
    12. <span style=”font-weight: 400;”>export default ViewVideo;</span>

    Now we will create screen on navigation and call this page. So open index.js on root

    So first import  ViewVideo on index

    1. import ViewVideo from ‘./src/components/ViewVideo’;

    Not add screen for this so add after comma

    1. …….
    2. YoutubeVideo: {
    3. screen: YoutubeVideo
    4. },
    5. Index: {
    6. screen: Index
    7. },
    8. VideoList: {
    9. screen: VideoList
    10. },
    11. ViewVideo: {
    12. screen: ViewVideo
    13. }
    14. ……

    Now our screen is ready to call as navigator. we have button on each video as View. So we will call on Press function to pass props and video id and send to ViewVideo page.

    Open VideoList.js file and find code where <Button /> added

    Add onPress function in it

    1. <Button onPress={() => this.props.navigation.navigate(‘ViewVideo’, { vidid: video.id })}>

    this.props.navigation.navigate this function call screen and send to that screen which is added in ‘ ‘ second parameter is props . i have taken vidid as props and assigned video id value to it

    So now we will refresh simulator 

  • Passing Navigation props to screen : Part 14

    Passing Navigation props to screen – Open View Video.js file and get props video id . so our code should be to get value.

    this.props.navigation.state.params.vidid;

    so add

    1. const videoId = this.props.navigation.state.params.vidid;

    Now we can call { vidid } and use to display videoid which is clicked on VideoList page. So to check it 

    Now in return we will call vidid in Text

    So change Text like this

    1. <Text>{vidid}</Text>

    Now refresh simulator and click on button of any video you will see that video id on that page

    Now import WebView from react-native

    WebView use to embed any url on page . It is same like we use iframe in normal html code. So we will use youtube embed url to embed video here using this component

    Now in return add this code

    1. <WebView
    2. source={{ uri: ‘https://www.youtube.com/embed/’ + videoId }}
    3. />
  • Modifying Navigation & Header : Part 15

    Modifying Navigation & Header – Copy api key and add in ViewVideo youtube parameter which was null. Now your code is ready to play video.

    But you can see a arrow in header of page. If you would like to remove it you nee to pass a option in navigator.

    So add this new code

    const options = {

     header: null

    };

    And now we will call this navigation option in StackNavigator so your code should look like this

    const AppNav = StackNavigator({

       YoutubeVideo: {

         screen: YoutubeVideo

       },

       Index: {

         screen: Index

       },

       VideoList: {

         screen: VideoList

       },

       ViewVideo: {

         screen: ViewVideo

       }

     },

       {

         navigationOptions: options

       }

    );

    Final code of screen in index.js

    1. import { AppRegistry } from ‘react-native’;
    2. import { StackNavigator } from ‘react-navigation’;
    3. import YoutubeVideo from ‘./App’;
    4. import VideoList from ‘./src/components/VideoList’;
    5. import Index from ‘./src/components/Index’;
    6. import ViewVideo from ‘./src/components/ViewVideo’;
    7. const options = {
    8. header: null
    9. };
    10. const AppNav = StackNavigator({
    11. YoutubeVideo: {
    12. screen: YoutubeVideo
    13. },
    14. Index: {
    15. screen: Index
    16. },
    17. VideoList: {
    18. screen: VideoList
    19. },
    20. ViewVideo: {
    21. screen: ViewVideo
    22. }
    23. },
    24. {
    25. navigationOptions: options
    26. }
    27. );
    28. AppRegistry.registerComponent(‘youtube_video’, () => AppNav);

    Now you can see we have blank page when go back , it is because we have Index screen to load then video list screen to load, So now we will do some modifications to use navigator header and remove Index component

    Final touch

    Now open VideoList.js and change variable with this code

    1. const url = ‘http://www.youtube.com/feeds/videos.xml?playlist_id=LLA34Z3lq8FozSQzDHsSLcmQ’;

    Now you can see i have directly added playlist id in const url

    Well, Now we will create a function to render navbar header

    1. renderNavBar() {
    2. return (
    3. <View style={styles.navBar}>
    4. <TouchableOpacity style={styles.logo} >
    5. <Text style={styles.text}>Pankaj Bhadouria Masterchef</Text>
    6. </TouchableOpacity>
    7. </View>
    8. );
    9. }

    and call this function in render function of component where header is called, So remove Header component and add

    1. render() {
    2. return (
    3. <View>
    4. { this.renderNavBar() }
    5. <ScrollView>
    6. {this.renderthumbnails()}
    7. </ScrollView>
    8. </View>
    9. );
    10. }

    If you want to show video title of youtube on view video page so pass video.title props in onPress function so change like this

    1. <Button
    2. onPress={() => this.props.navigation.navigate(‘ViewVideo’, { vidid: video.id, vidtitle: video.title })}
    3. >

    and finally open ViewVideo.js and call this props like this

    1. import React, { Component } from ‘react’;
    2. import { View, WebView } from ‘react-native’;
    3. import NavBar from ‘../common/NavBar’;
    4. class ViewVideo extends Component {
    5. render() {
    6. const videoId = this.props.navigation.state.params.vidid;
    7. const videoTitle = this.props.navigation.state.params.vidtitle;
    8. return (
    9. <View style={{ flex: 1 }}>
    10. <NavBar
    11. navigator={this.props.navigation}
    12. title={videoTitle}
    13. />
    14. <WebView
    15. source={{ uri: `https://www.youtube.com/embed/${videoId}` }}
    16. />
    17. </View>
    18. );
    19. }
    20. }
    21. export default ViewVideo;

    Now our application is ready to play youtube video . If you need to find code you can find it on GIT

    In this tutorial we learned how to install react native , create component, create design , navigation and parse video xml of youtube

    Hope you enjoyed it !!