
Introduction
Managing employee reimbursements manually? You’re not alone. Many finance teams still rely on email threads, spreadsheet juggling, and back-and-forth approvals that waste valuable time and increase the risk of errors.
But what if you could automate the entire reimbursement approval process—from collecting claims to logging approved entries in Excel—without writing a single line of code?
In this blog, we’ll walk you through a practical, step-by-step solution using Microsoft Forms, Power Automate, and Excel Online. By the end, you’ll have a fully automated system where employees submit claims through a form, finance receives approval requests instantly, and approved claims are automatically logged into a centralized Excel file for processing.
Let’s make your finance workflow faster, smoother, and error-free.
Prerequisites
You’ll need a Microsoft 365 account and access to the following:
- Microsoft Forms
- Power Automate
- OneDrive or SharePoint
- Excel Online
- An Excel sheet with a table
- A Microsoft Form for collecting reimbursement requests
Step-by-Step Guide
First things first, head over to Microsoft Power Automate. You’ll find hundreds of ready-to-use templates there—we’ll use one of them to build our reimbursement approval flow.
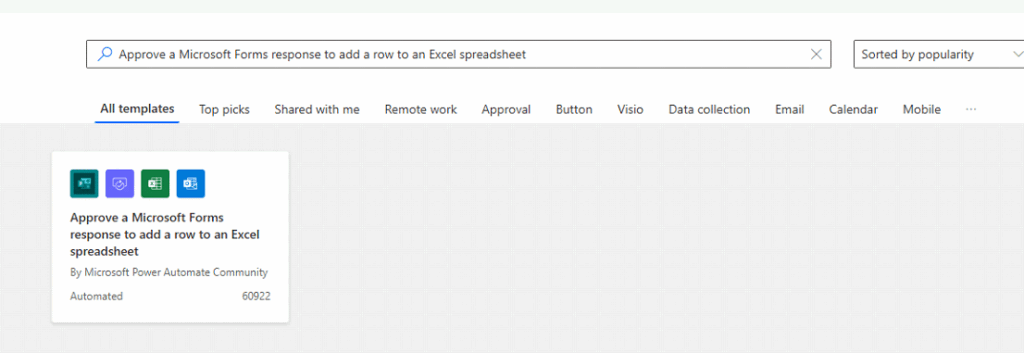
Search for this template:
“Approve a Microsoft Forms response to add a row to an Excel spreadsheet”
Search this template you will get result-
But before using this template, let’s prepare the Microsoft Form and Excel sheet required to set up this flow.
To go https://forms.office.com/ and click on create new form and add these fields to create a form use title it: “Reimbursement Claim Form” or what ever depends on your business need.
Add the following fields (example):
- Full Name
- Department
- Expense Type
- Amount
- Date of Expense
- Comments
- Status (Approved/Rejected)
- Approval Date
Select the range and click Insert → Table. Name the table as ClaimsTable.
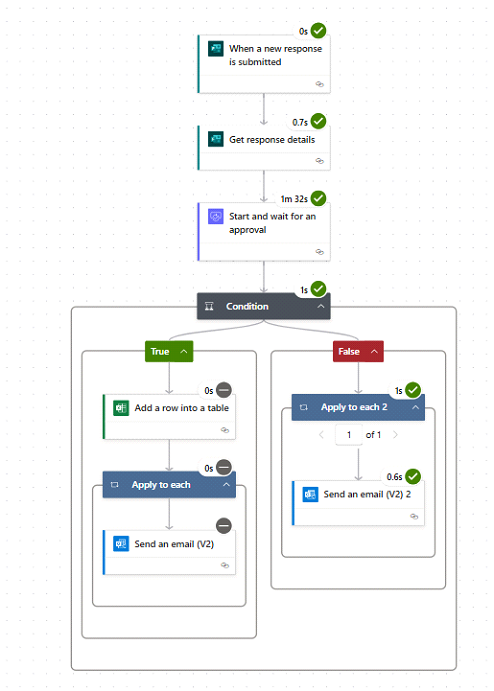
Now go back to template and select template make sure all app connection or okay like this.
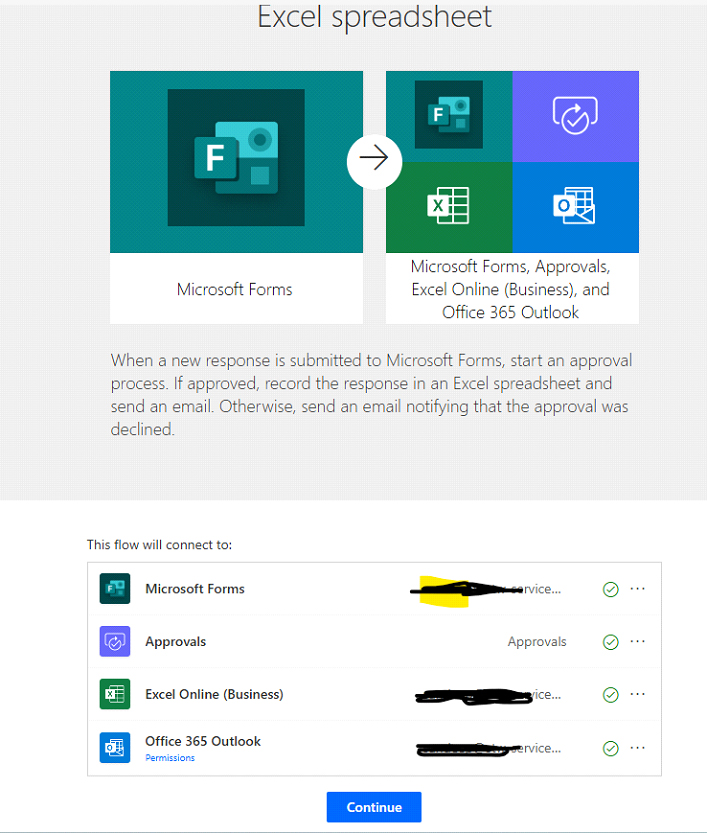
Check the connection for Microsoft Form, approval, Excel online, and Office 365 Outlook. If all connections are okay, click on continue or fix the connection issue using your Microsoft login.
Once you click on continue, it requires all details to be filled in in the next step. Fill details like form ID, Excel path and table, also the person who will approve/ disapprove the request, like given example:
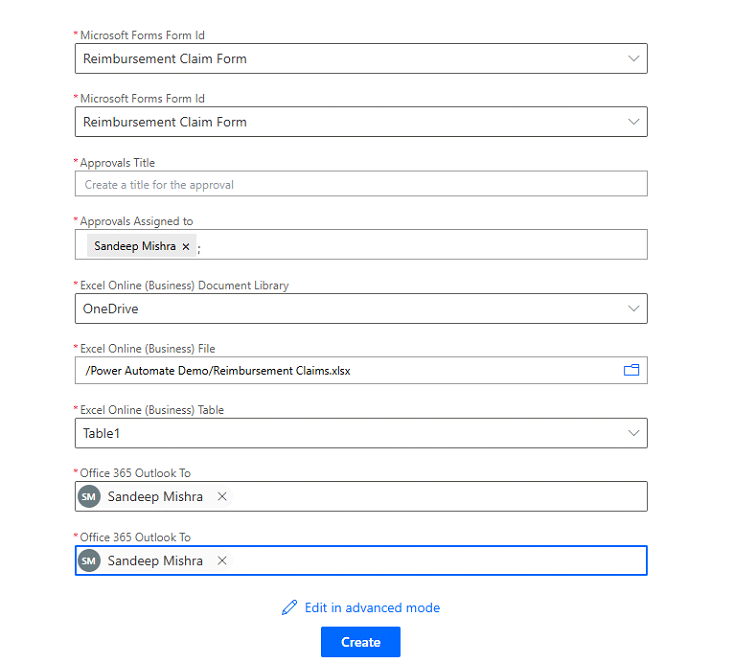
Once filled click on continue and your flow will be read.
Testing:
Click on Test in the top right-side bar and fill out the Microsoft form and submit it. You can see an approval/disapproval request in Microsoft Teams like this:
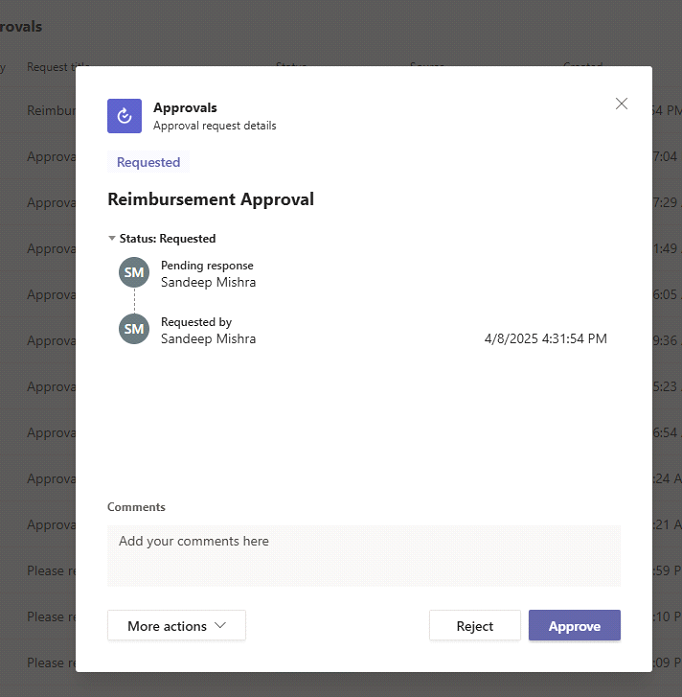
Your action will run accordingly. Wow, the flow is running fine.
Conclusion
With just a few simple tools—Microsoft Forms, Power Automate, and Excel Online—you can completely transform how your finance team handles reimbursement claims. What once required manual emails, approvals, and spreadsheet updates can now be streamlined into an automated, error-free workflow.
Not only does this save valuable time, but it also improves transparency, speeds up approvals, and ensures that no request falls through the cracks.
Ready to go further? You can enhance this setup by integrating notifications in Microsoft Teams, tracking metrics in Power BI, or adding file uploads for receipts. The possibilities with Power Platform are endless!
Start small, automate one process, and you’ll quickly see the impact across your entire organization.